Prohibition in the United States lasted from 1920, when the 18th amendment prohibiting the sale of alcohol went into effect, until 1933, with its repeal via the 21st amendment.
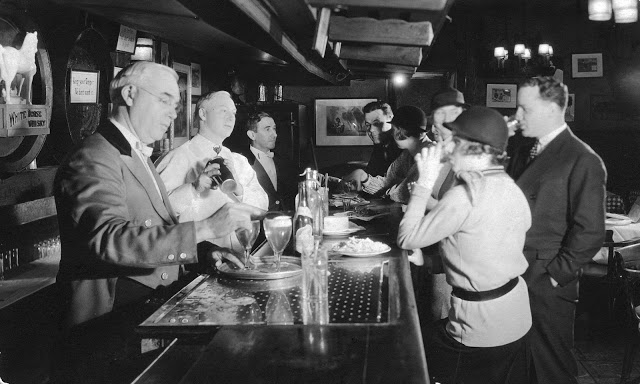
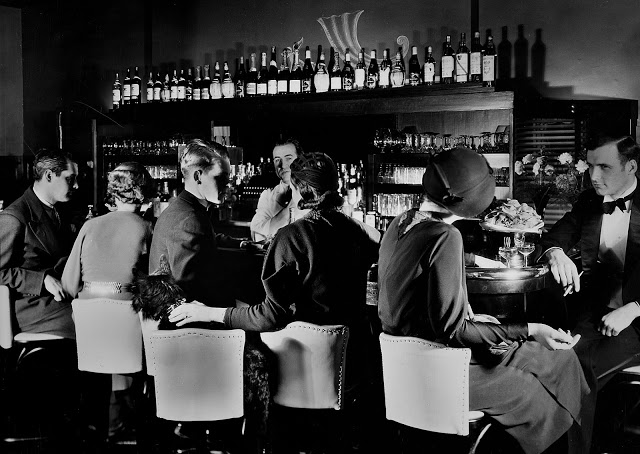
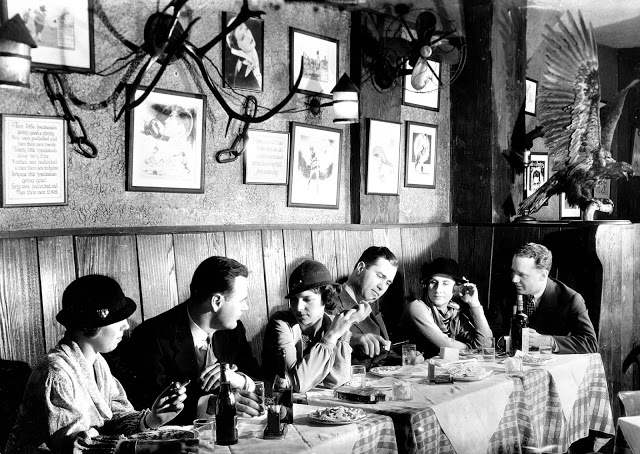
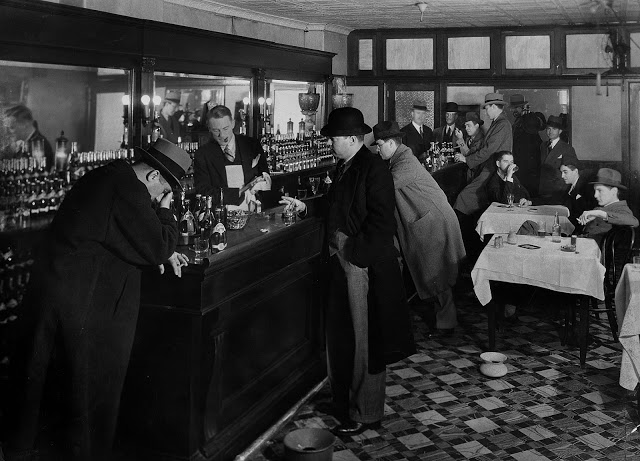
During the Prohibition, and forbade any sale, production importation, and transportation of alcoholic beverages, the speakeasy became the place to socialize at. These speakeasies were bars that illegally sold booze to their customers behind locked doors. Some of these popular places were run by criminals, and even though the police would sometimes raid the bars and arrest both the owners and their customers, the speakeasies were so profitable they continued to flourish.
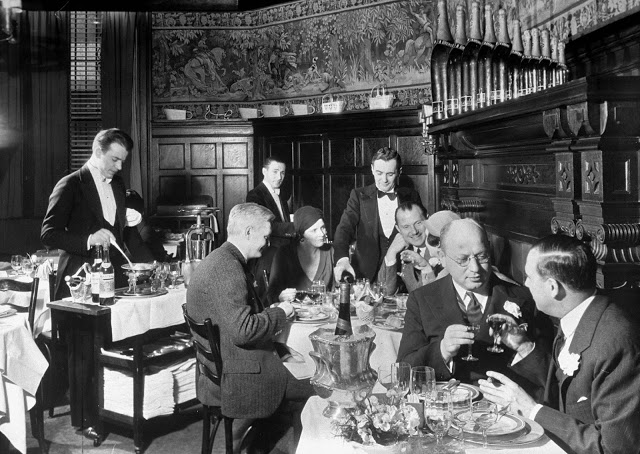
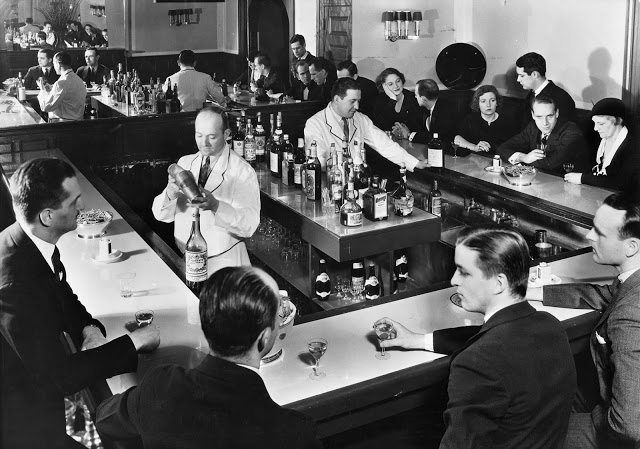
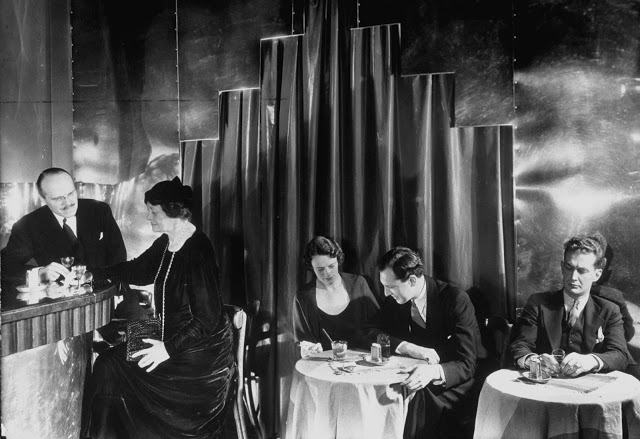
Photographer Margaret Bourke-White were able to take some photos at a few of these notorious bars in 1933 – the year the Prohibition ban was lifted, and therefor meant the speakeasies could take the locks off their doors. Bourke-White’s photos ran in the June 1933 issue of FORTUNE, under the simple and evocative title, “Speakeasies of New York.”
Patrons enjoying drinks at the Hunt Club. a speakeasy with a filing system listing their 23,000 eligible customers which is checked before a customer gets through the door at this venue that is protected from police prohibition raids.Celebrity patrons enjoying drinks at this unidentified smart modern speakeasy , which is popular with Greta Garbo & Beatrice Lillie, where they can bring their dogs while eating & drinking without fear of police prohibition raids.No speakeasy is as popular with aviators off duty as this quiet place. Its proprietor owns tow planes, is himself an expert pilot.In the heart of a business section Thomas keeps this speakeasy on the second floor. Drinking starts at 8:30 A.M. when full-bellied Irish contractors drop in for a solidly comforting rye.Champagne from right to left, on mantel: half nip, nip, pint, imperial pint, magnum, jeroboam, rehoboam, methuzelah, salmanazar, balthazar… Twenty-nine waiters and eight chefs are none too many for a popular place.Social atmosphere has made the popularity of this speakeasy, which is full of gay chintz, red and white awnings, indirect lights. The barroom is gold and Victorian-green.Scene inside a New York City speakeasy during Prohibition, 1933.
(Photos: Margaret Bourke-White—The LIFE Picture Collection/Getty Images)
The Irish Civil War was a conflict that followed the Irish War of Independence and accompanied the establishment of the Irish Free State, an entity independent from the United Kingdom but within the British Empire.
The civil war was waged between two opposing groups, Irish republicans and Irish nationalists, over the Anglo-Irish Treaty. The forces of the Provisional Government (which became the Free State in December 1922) supported the Treaty, while the Republican opposition saw it as a betrayal of the Irish Republic (which had been proclaimed during the Easter Rising). Many of those who fought on both sides in the conflict had been members of the Irish Republican Army (IRA) during the War of Independence.
The Civil War was won by the Free State forces, who benefitted from substantial quantities of weapons provided by the British Government. The conflict may have claimed more lives than the War of Independence that preceded it, and left Irish society divided and embittered for generations.
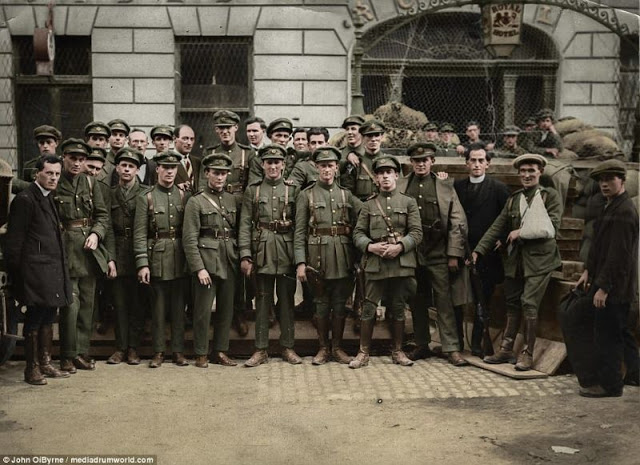
These war-time photographs were colourized by photographer and colourist John O’Byrne from Rathangan, Kildare, Ireland that show the Irish conflict which led to thousands of deaths and prisoners of war.
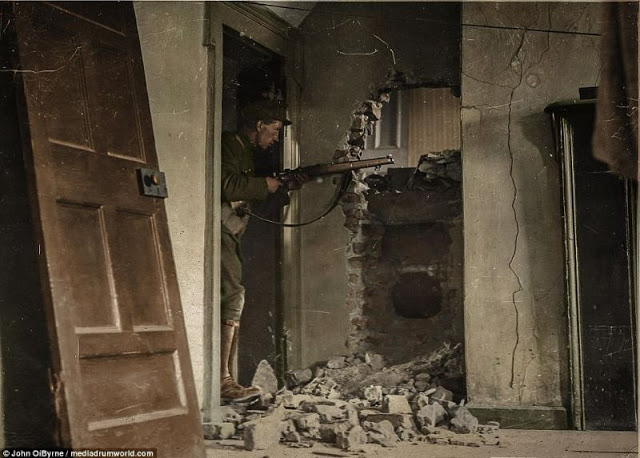
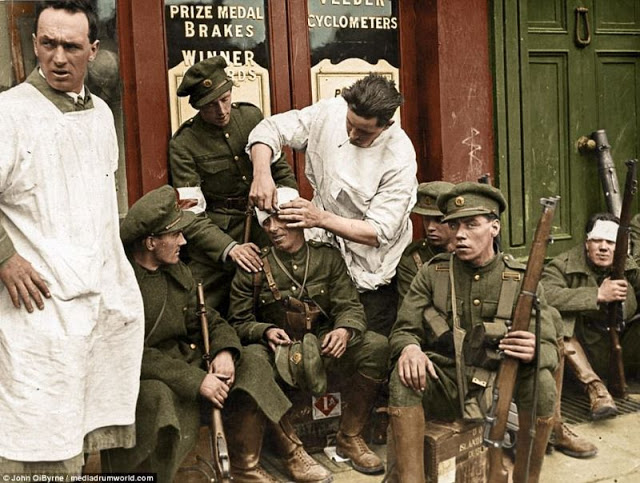
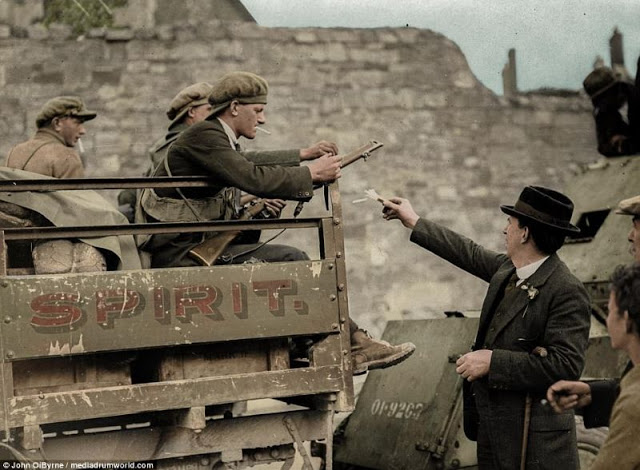
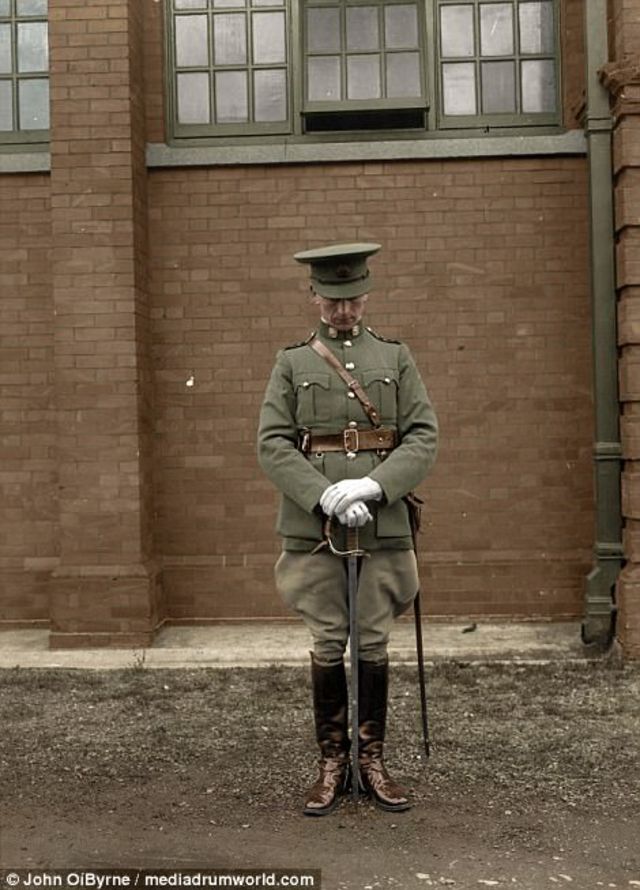
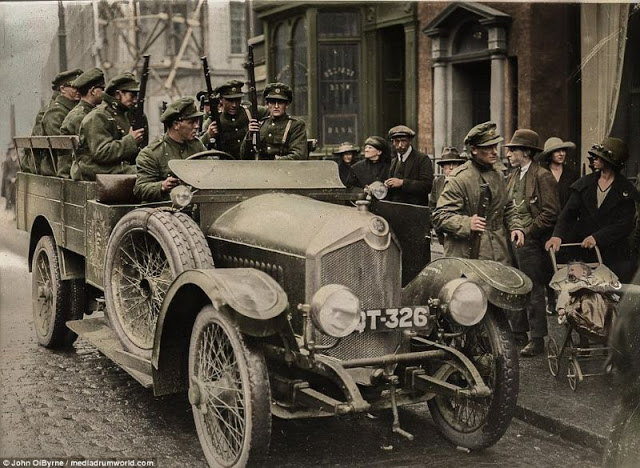
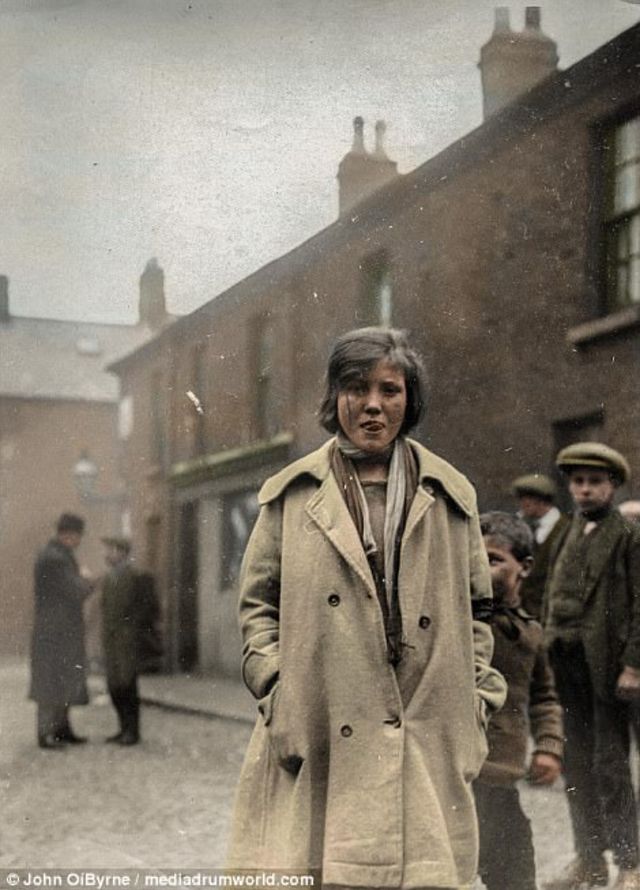
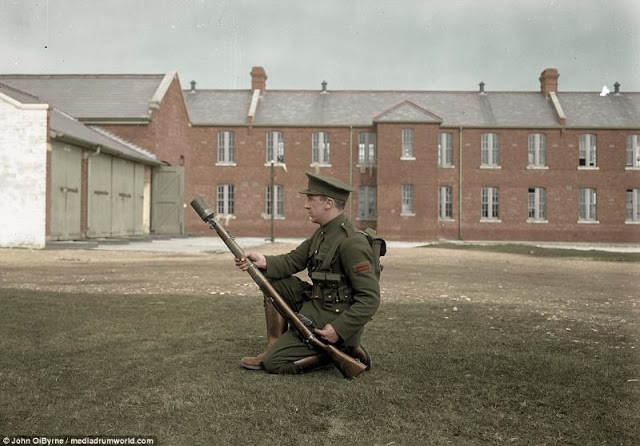
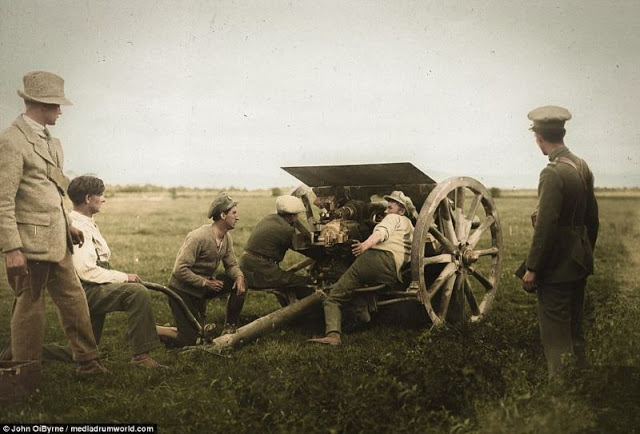
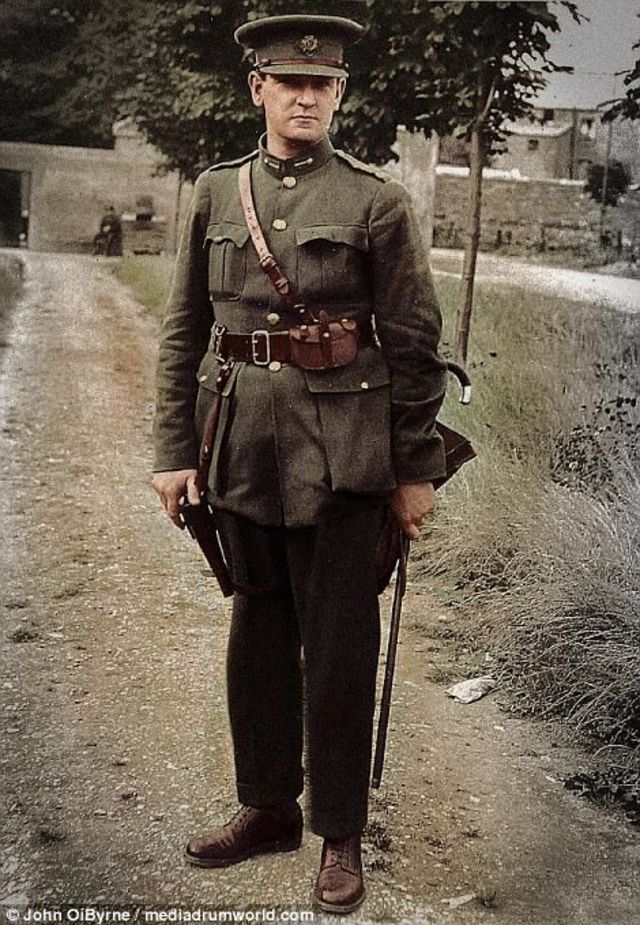
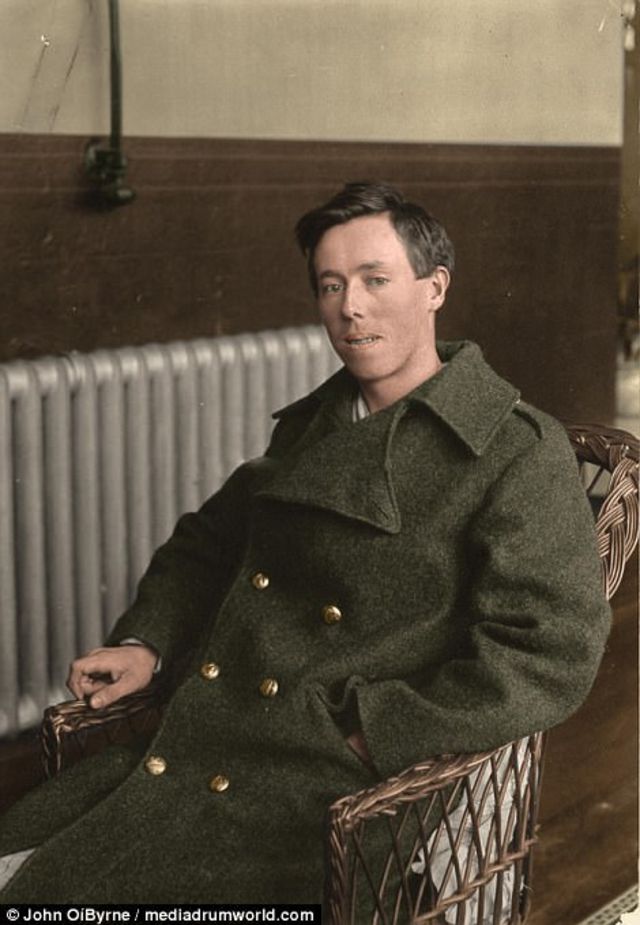
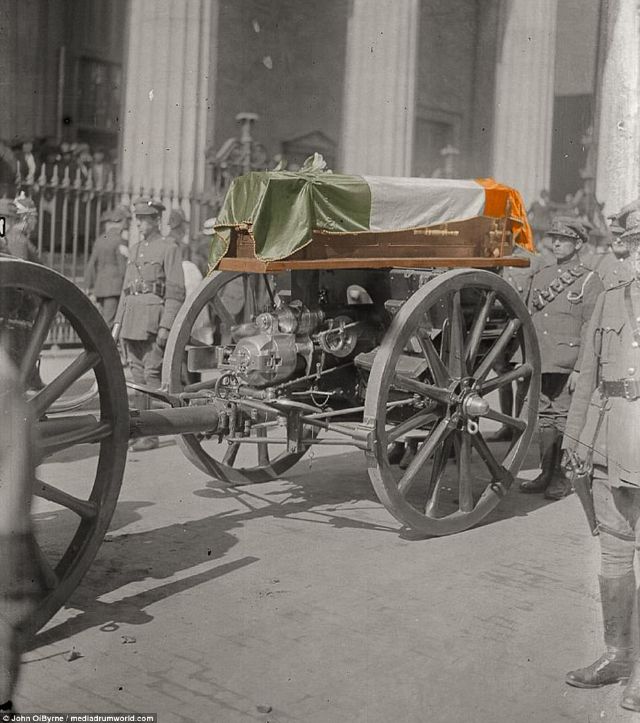
Irish Free State Army soldier in firing position inside a badly damaged house. His rifle is pointed through a hole in the wall of a room and debris is lying on the ground and a door has been kicked off its hinges. The treaty also stipulated that members of the new Irish parliament would have to take the following Oath of Allegiance: “I… do solemnly swear true faith and allegiance to the Constitution of the Irish Free State as by law established, and that I will be faithful to His Majesty King George V, his heirs and successors by law in virtue of the common citizenship of Ireland with Great Britain and her adherence to and membership of the group of nations forming the British Commonwealth of nations”Free State Soldiers take a break from fighting on the street in Dublin possibly during the fighting of the four courts where wounded men are being tended to while others catch their breath. The Irish Civil War was a conflict that followed the Irish War of Independence and came alongside the establishment of the Irish Free State, an entity independent from the United Kingdom but within the British Empire. The civil war was waged between two opposing groups, Irish republicans and Irish nationalists, over the Anglo-Irish TreatyIrish Free State Army officers and men outside the Royal Hotel in Limerick. Some are smoking and one is sporting an injured arm. The group includes two clergymen and some civilians. The hotel was fortified with a barricade, wire and sandbags. The forces of the Provisional Government – which became the Free State in December 1922 – supported the Treaty, while the Republican opposition saw it as a betrayal of the Irish Republic, which had been proclaimed during the Easter Rising. Many of those who fought on both sides in the conflict had been members of the Irish Republican Army (IRA) during the War of Independence.A man in civilian clothes reaching up with cigarettes to Irish Free State Army soldiers in a spirit merchant’s truck as locals stand by watching.An unmounted officer stands with a drawn sword held at shoulder height in a sword drill under the supervision of Captain Flanagan and Captain Nolan at McKee Barracks Dublin.A personnel carrier containing a group of Irish Free State Army soldiers drawing up outside the Belfast Banking Company in College Green, Dublin, watched by curious onlookers, including a woman with a baby in a pram. Exact casualties numbers have been hard to determine in the aftermath of the war, but it is estimated. Around 800 pro-Treaty fighters backed by the UK fighters are thought to have been killed while up to 3,000 anti-Treaty fighters are said to have died. Although the conflict lasted less than a year – from June 28, 1922 to May, 24 1923 – it is thought up to 12,000 were taken as prisoners of war by the British-backed forces.A young girl wearing an ill-fitting coat stands in a street of terraced houses thought to be in Belfast. Some boys are looking on and two men are having a conversation in the background.An infantry sergeant holding a grenade launcher in a glass plate negative showing an the infantry sergeant. The picture was printed to display how to fire a grenade from a Lee Enfield rifle from the kneeling position. This plate could have been used for instructional purposes and used in training manuals. The Anglo-Irish Treaty was agreed to end the 1919 to 1921 Irish War of Independence between the Irish Republic and the United Kingdom of Great Britain and Ireland. The treaty provided for a self-governing Irish state, having its own army and police and also allowed Northern Ireland’s counties of Fermanagh, Antrim, Tyrone, Derry, Armagh and Down where the majority population was of the Protestant religion to opt out of the new state and return to the United Kingdom – which it did immediately.Group of Irish Free State Army soldiers grouped behind heavy field artillery. Two of the soldiers appear to be manoeuvring the gun into position watched by the others, including one wearing civilian tweeds. Rather than creating the independent republic favoured by most nationalists, the treaty meant the Irish Free State would be an autonomous dominion of the British Empire with the British monarch as head of state, similar to Canada and Australia. The British suggested this dominion in secret correspondence even before treaty negotiations began, but then Sinn Féin leader Éamon de Valera rejected it.General Michael CollinsAn Irish Free State Army soldier wearing his uniform coat but sitting in a wicker chair . He is identified in the caption as John Foley, third battalion, wounded in the thigh.A photograph from the funeral of Michael Collins. The Irish flag is actually facing the wrong way – a mistake only noticed after it was placed on the coffin. The green should be at the head of the coffin. Michael Collins is an influential figure in the history of twentieth century Ireland. After the controversial treaty negotiations with Britain, he was appointed Chairman and Minister of Finance of the provisional government which was responsible for the establishment of the Irish Free State. He played a decisive role in devising a constitution, creating security forces and appointing a civil service. He was murdered while on an inspection tour of Munster and searching for a basis for peace with IRA leaders opposed to the Treaty.
James Byron Dean (February 8, 1931 – September 30, 1955) was an American actor. He is remembered as a cultural icon of teenage disillusionment and social estrangement, as expressed in the title of his most celebrated film, Rebel Without a Cause (1955), in which he starred as troubled teenager Jim Stark. The other two roles that defined his stardom were loner Cal Trask in East of Eden (1955) and surly ranch hand Jett Rink in Giant (1956).
After his death in a car crash, Dean became the first actor to receive a posthumous Academy Award nomination for Best Actor, and remains the only actor to have had two posthumous acting nominations. In 1999, the American Film Institute ranked him the 18th best male movie star of Golden Age Hollywood in AFI’s 100 Years…100 Stars list.
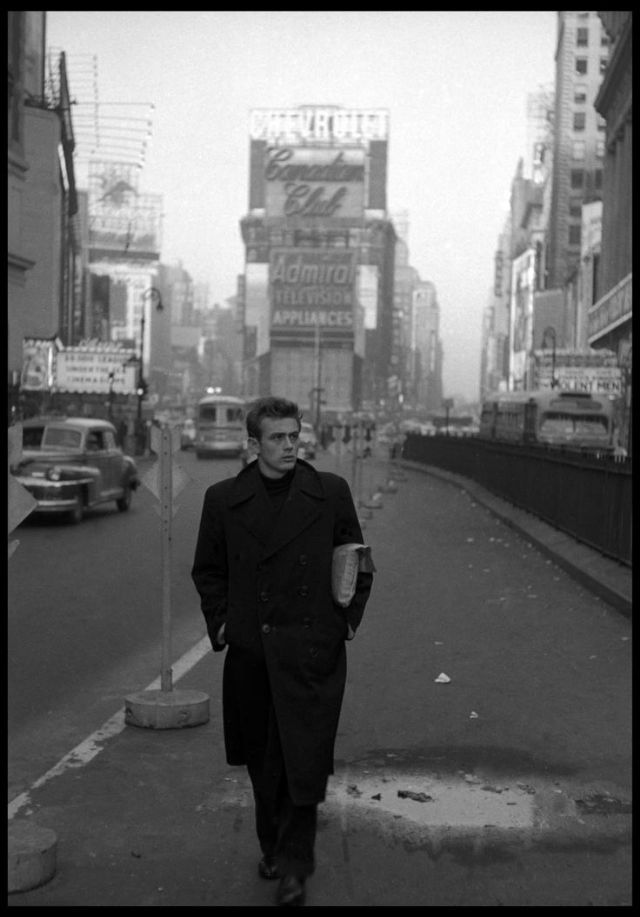
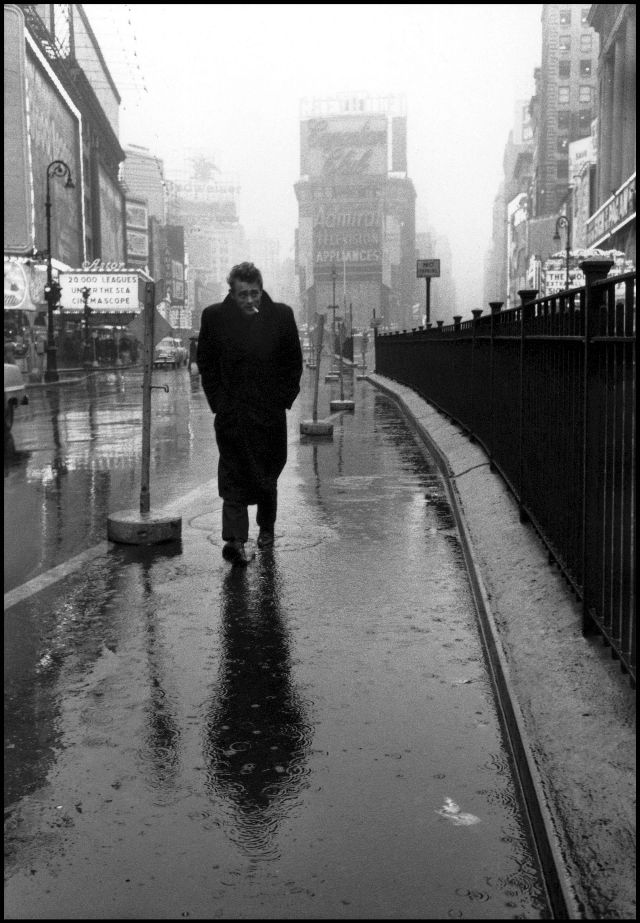
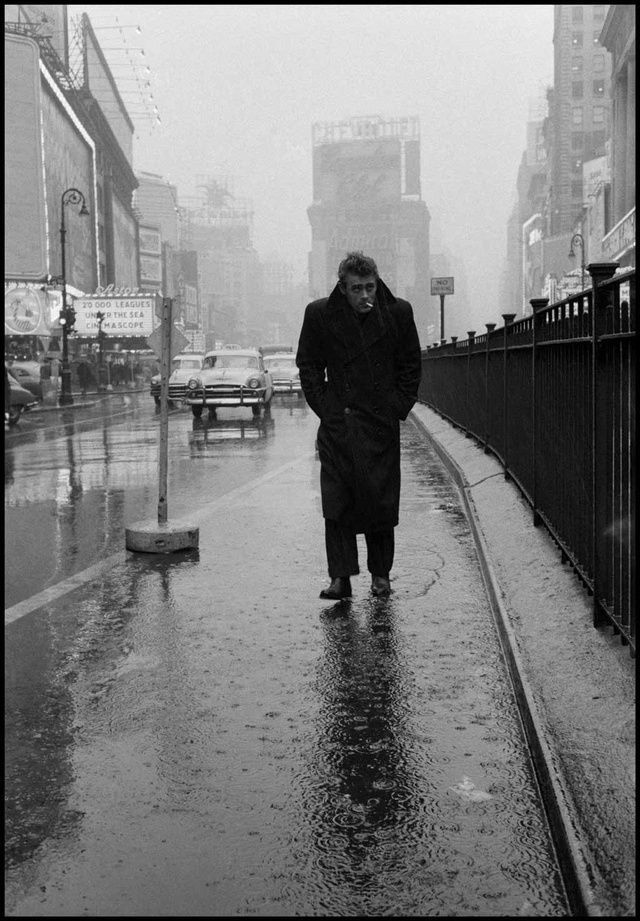
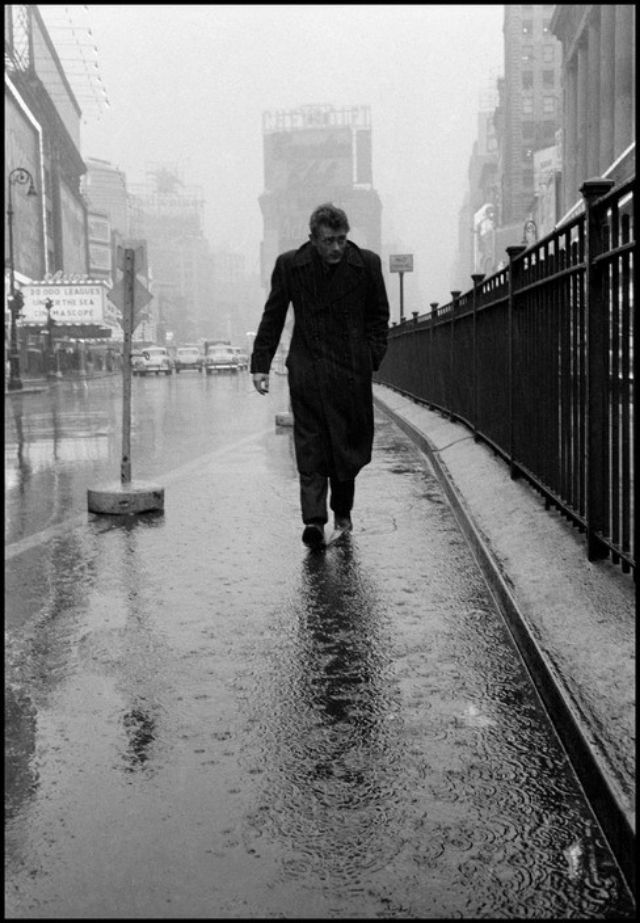
The picture, shot by Dennis Stock in early 1955, shows Dean walking alone in an eerily empty Times Square. It’s a lousy day. Wearing a long, wool coat, hunched against the chill, a cigarette loosely clamped in his lips, the actor is seen in mid-stride, stalking through the bleak Manhattan rain. At first glance, it might be a portrait of isolation, or even downright despair.
James Dean in New York City, 1955.
When the Magnum photographer Dennis Stock met actor James Dean in Hollywood in 1955, something about the rising star caught his attention. The young actor had yet to make what would be the defining film of his short career – Rebel Without a Cause – and, while not completely unknown, he was not the iconic figure he would soon become. Yet Stock, who at the time was making a steady living as a photographer for LIFE magazine, couldn’t get the actor out of his head. He saw something in Dean – charisma certainly, an untapped star quality – and was determined to capture him on film.
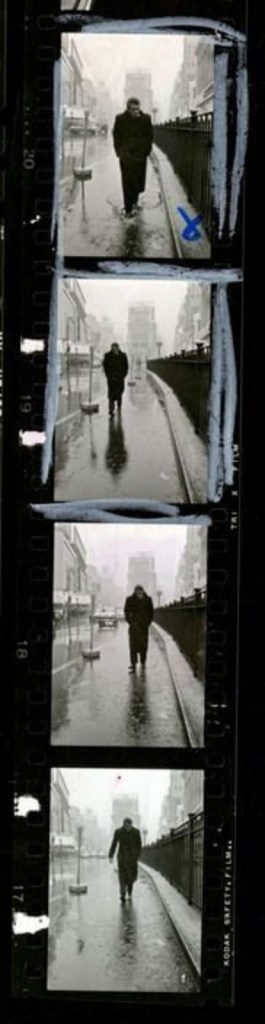
While in New York, Dean attended classes at the famous Actor’s Studio, directed by Lee Strasberg. While on the way to the studio one day, Stock photographed Dean in nearby Times Square. Rain was falling heavily and a light mist hung in the distance. Stock asked Dean to walk towards him a couple of times and shot just four frames with the actor at different distances from the camera.
Dennis Stock’s contact sheet.
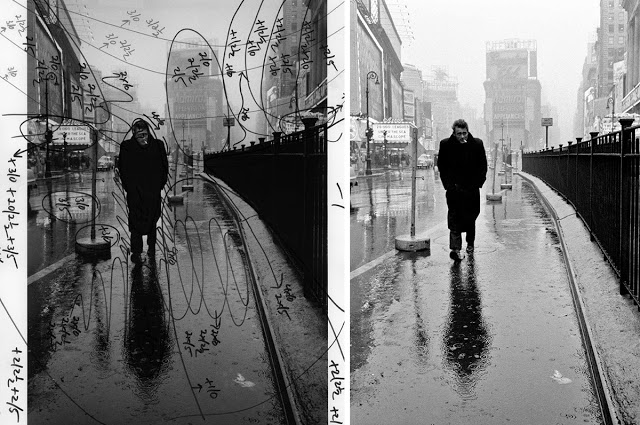
Three of the four frames showed Dean at the centre of the image, his outline conflicting with a building behind him. However, one of the shots was perfectly composed, with Dean placed against a clearer background and roughly one third of the way across the frame. Stock had instinctively used Dean’s reflection in the wet street as part of his composition, and further strengthened the image by using the pavement and railings on the right to lead into the subject.
James Dean in Times Square by Dennis Stock, dark room print notes by Pablo Inirio.
As well as having the ideal composition, the weather conditions lent the image a moody atmosphere that expressed something about Dean’s character. He looks solitary and battered by the elements, but at the same time looks coolly resilient to his surroundings. The picture also has a biographical element in that the background includes the awnings of cinemas where, as a young actor, he aspired to appear.
This devastating photograph from 1948 seems unreal. Surely people can’t sell their children in the United States, even in the 1940s?
04 Aug 1948, Chicago, Illinois, USA — Original caption: August 4, 1948 – Chicago, Illinois: They’re on the auction block. These small children of Mr. and Mrs. Ray Chalifoux of Chicago, Illinois. For long months 40 year old Ray and his wife, Lucille, 24, waged a desperate but losing battle to keep food in the mouth and a roof over their heads. Now jobless and facing eviction from their near barren flat, the Chalifoux have surrendered to their heart breaking decision. Photo shows mother sobbing as the children pose wonderingly on the steps. Left to right: Lana,6. Rae, 5. Milton, 4. Sue Ellen, 2 years old.
Family members accused the mother of being paid to stage the photo, which may have been part of the story, but unfortunately, she was dead serious about selling her children. Within two years all of the children pictures, as well as the baby she was carrying at the time, were sold off to different homes. Just a few years ago the scattered siblings tried to find each other, and their stories are of raw survival and heartbreak.
Before being picked up for national newspapers, the photo first appeared in The Vidette-Messenger of Valparaiso, Indiana on Aug. 5, 1948. The children looked posed and a bit confused as their pregnant mother hides her face from the photographer. The caption read:
“A big ‘For Sale’ sign in a Chicago yard mutely tells the tragic story of Mr. and Mrs. Ray Chalifoux, who face eviction from their apartment. With no place to turn, the jobless coal truck driver and his wife decide to sell their four children. Mrs. Lucille Chalifoux turns her head from camera above while her children stare wonderingly. On the top step are Lana, 6, and Rae, 5. Below are Milton, 4, and Sue Ellen, 2.”
“No one believes it,” Lance Gray said about his mother RaeAnn’s horrific and dramatic life story. In 2013 the then 70-year-old RaeAnn Mills reunited with her 67-year-old sister Sue Ellen Chalifoux for the first time since they were seven and four. By the time of their reunion Sue Ellen was dying of lung cancer but RaeAnn was grateful for the brief, bittersweet reunion. “It’s one of the happiest days of my life,” RaeAnn said of the trip she took with her son to visit Sue Ellen a few months before she passed away. Sue Ellen could no longer speak when they met, but she could write. “It’s fabulous. I love her,” she wrote of her sister RaeAnn, but minced no words about her birth mother: “She needs to be in hell burning.”
Sue Ellen, left, and her sister RaeAnn Mills were reunited at Chalifoux’s home in Hammond.
David McDaniel, who was in his mother’s womb at the time of photograph, never got to meet Sue Ellen before she passed away, or their older sister Lana, who died before the siblings started reconnecting.
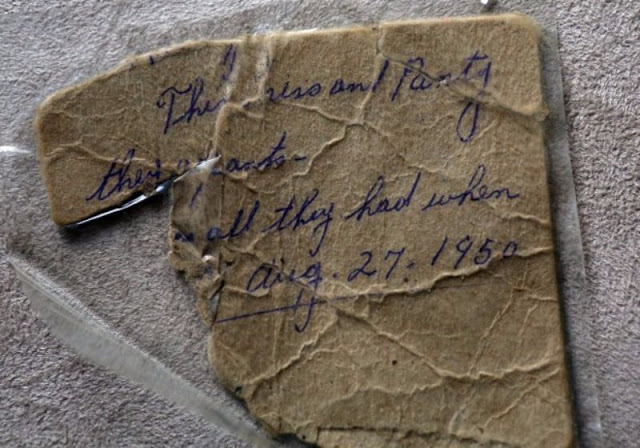
According to RaeAnn, she was sold for $2 to farmers John and Ruth Zoeteman on Aug. 27, 1950. Her brother Milton was crying nearby during the transaction, so the couple took him as well. Their names were changed to Beverly and Kenneth, and although their birth mother’s situation was dire, their new home wasn’t much of a salvation. They were often chained up in a barn and forced to work long hours in the field. Milton remembers being called a “slave” by his new father figure, a label he accepted at the time because he didn’t understand what it meant.
Although it seems that RaeAnn and Milton were never officially adopted by their abusers, their brother David (born Bedford Chalifoux) was legally adopted by Harry and Luella McDaniel, who only lived a few miles away. David, who says his adoptive parents were strict but loving and supportive, remembers riding out on his bike to see his siblings, and unchaining them before going back home.
RaeAnn Mills, left, and her brother were sold to the Zoeteman family.
RaeAnn left home at 17, shortly after undergoing a brutally traumatic situation. As a young teen she was kidnapped and raped, which resulted in a pregnancy. She was sent away to a home for pregnant girls, and had her baby adopted when she returned.
As Milton grew older, he reacted to the beatings, starving, and other abuses with violent rages. A judge deemed him a menace to society, and de spent a number of years in a mental hospital after being forced to choose between that and a reformatory (a juvenile detention center.)
The woman in the photograph remarried after selling/giving away her five children, and had four more daughters. When her other children eventually came to see her, she’s described as completely lacking love for her estranged children, or having any regret for letting them go.
A note sent with RaeAnn Mills when she was sold that describes her belongings, which was only the clothes she was wearing.
David McDaniel defended his mother’s coldness as evidence of a different, hardscrabble world. “As soon as my mom seen me, she said, ‘You look just like your father,’” McDaniel said. “She never apologized. Back then, it was survival. Who are we to judge? We’re all human beings. We all make mistakes. She could’ve been thinking about the children. Didn’t want them to die.”
Milton had a different perspective on the situation: “My birth mother, she never did love me. She didn’t apologize for selling me. She hated me so much that she didn’t care.”
Tutankhamun, commonly referred to as King Tut, was an ancient Egyptian pharaoh who was the last of his royal family to rule during the end of the 18th Dynasty (ruled c. 1332 – 1323 BC in the conventional chronology) during the New Kingdom of Egyptian history. His father is believed to be the pharaoh Akhenaten, identified as the mummy found in the tomb KV55. His mother is his father’s sister, identified through DNA testing as an unknown mummy referred to as “The Younger Lady” who was found in KV35.
Tutankhamun took the throne at eight or nine years of age under the unprecedented viziership of his eventual successor, Ay, to whom he may have been related. He married his paternal half-sister Ankhesenamun. During their marriage they lost two daughters, one at 5–6 months of pregnancy and the other shortly after birth at full-term. His names—Tutankhaten and Tutankhamun—are thought to mean “Living image of Aten” and “Living image of Amun”, with Aten replaced by Amun after Akhenaten’s death. A small number of Egyptologists, including Battiscombe Gunn, believe the translation may be incorrect and closer to “The-life-of-Aten-is-pleasing” or, as Professor Gerhard Fecht believes, reads as “One-perfect-of-life-is-Aten”.
Tutankhamun restored the Ancient Egyptian religion after its dissolution by his father, enriched and endowed the priestly orders of two important cults and began restoring old monuments damaged during the previous Amarna period. He reburied his father’s remains in the Valley of the Kings and relocated the capital from Akhetaten back to Thebes. Tutankhamun was physically disabled with a deformity of his left foot along with bone necrosis that required the use of a cane, several of which were found in his tomb. He had other health issues including scoliosis and had contracted several strains of malaria.
The 1922 discovery by Howard Carter of Tutankhamun’s nearly intact tomb, in excavations funded by Lord Carnarvon, received worldwide press coverage. With over 5,000 artifacts, it sparked a renewed public interest in ancient Egypt, for which Tutankhamun’s mask, now in the Egyptian Museum, remains a popular symbol. The deaths of a few involved in the discovery of Tutankhamun’s mummy have been popularly attributed to the curse of the pharaohs. He has, since the discovery of his intact tomb, been referred to colloquially as “King Tut”.
Some of his treasure has traveled worldwide with unprecedented response. The Egyptian Supreme Council of Antiquities allowed tours beginning in 1962 with the exhibit at the Louvre in Paris, followed by the Kyoto Municipal Museum of Art in Tokyo, Japan. The exhibits drew in millions of visitors. The 1972–1979 exhibit was shown in United States, Soviet Union, Japan, France, Canada, and West Germany. There were no international exhibitions again until 2005–2011. This exhibit featured Tutankhamun’s predecessors from the 18th Dynasty, including Hatshepsut and Akhenaten, but did not include the golden death mask. The treasures 2019–2022 tour began in Los Angeles and will end in 2022 at the new Grand Egyptian Museum in Cairo, which, for the first time, will be displaying the full Tutankhamun collection, gathered from all of Egypt’s museums and storerooms. (Wikipedia)
Harry Burton’s photographs capture Tutankhamun’s tomb at the moment of its discovery have enthralled the world for generations, enabling the viewer to witness the ‘Wonderful Things’ the discoverers of the tomb, Howard Carter and Lord Carnarvon, were fortunate to experience first-hand.
Burton’s iconic black and white photographs have illustrated the imagination of millions for almost a century, and now a selection of the original negatives and photographs, housed in the archive of the Griffith Institute, University of Oxford, has been digitally colourised by Dynamichrome on behalf of SC Exhibitions and the Griffith Institute.
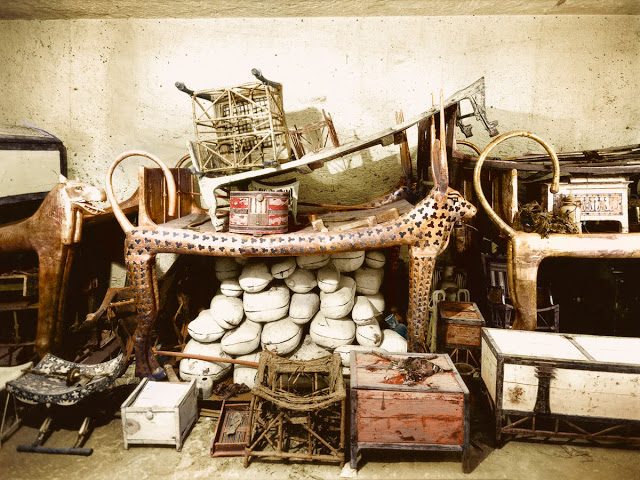
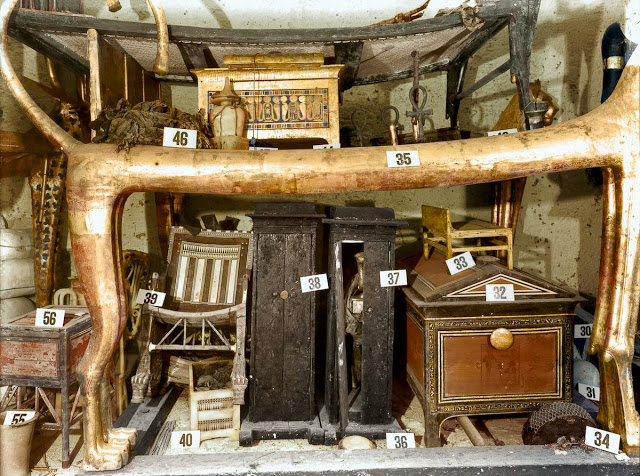
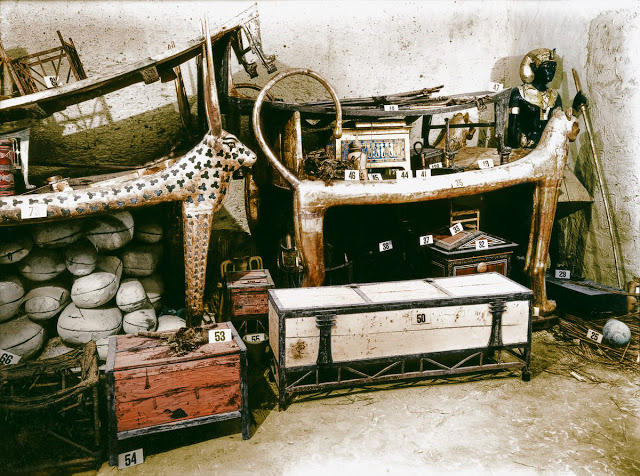
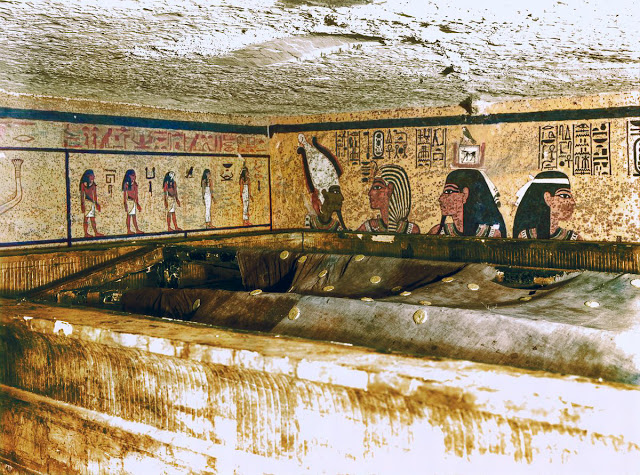
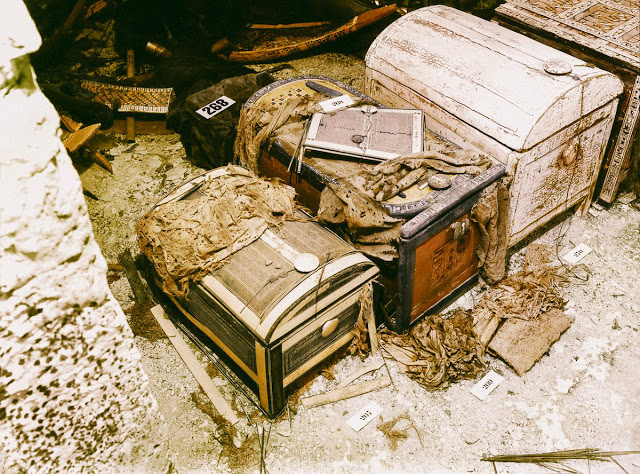
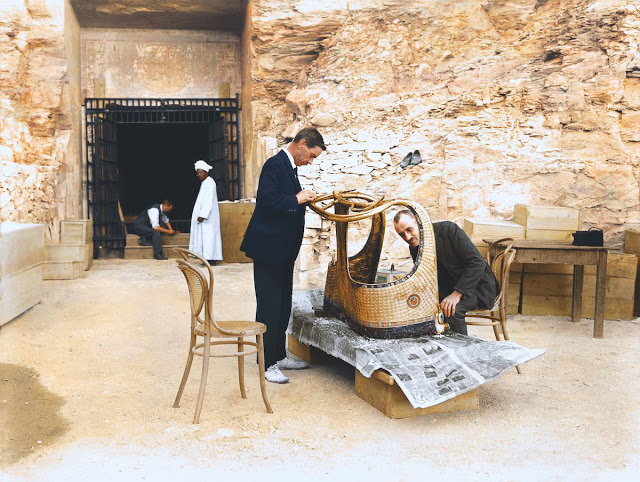
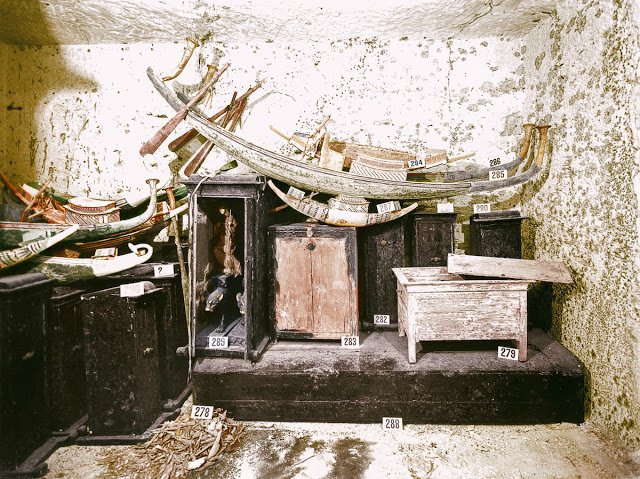
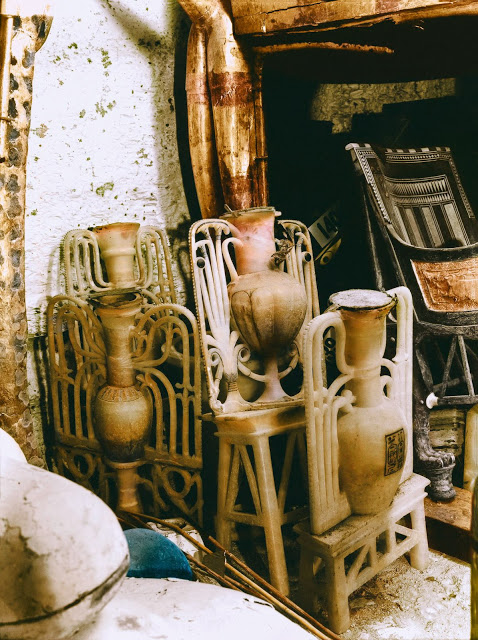
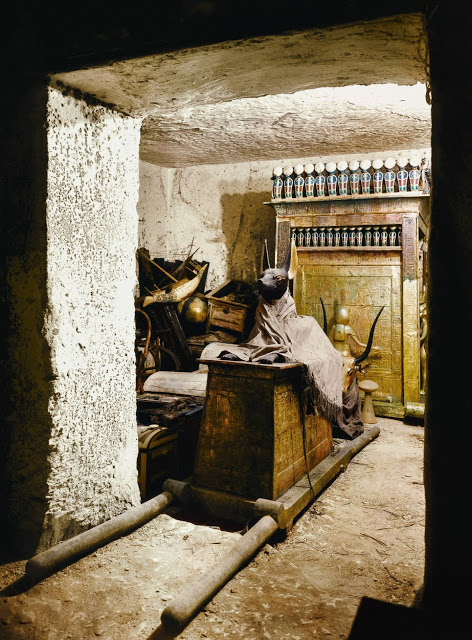
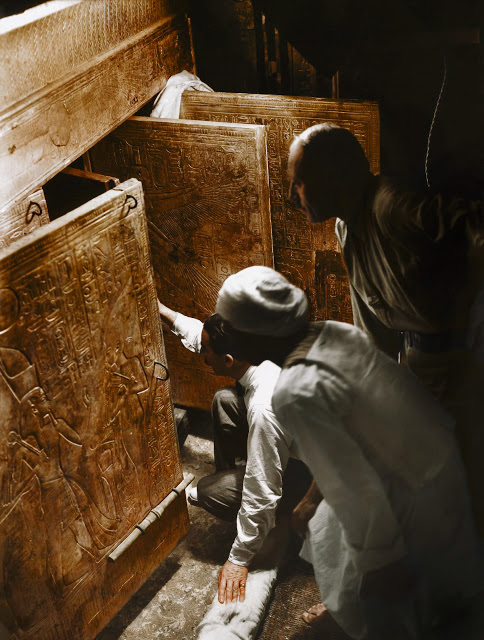
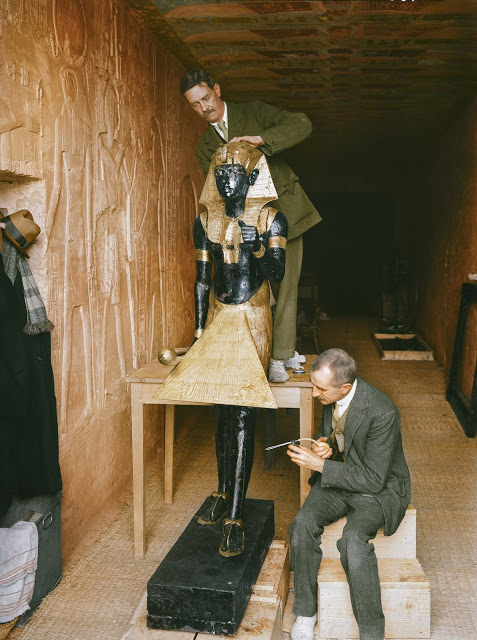
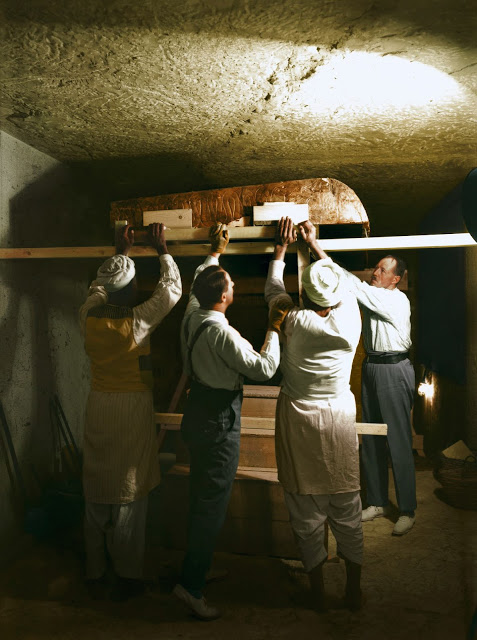
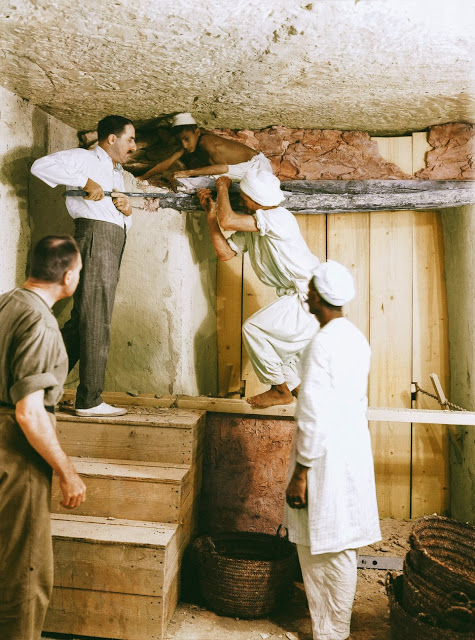
29th/30th October 1925, Tutankhamun’s Tomb | Carter and an Egyptian workman examine the third (innermost) coffin (Carter no. 255) made of solid gold, inside the case of the second coffin. (Carter no. 254).December 1922, Tutankhamun’s Tomb | Objects, including the cow-headed couch (Carter no. 73) and boxes containing joints of meat (Carter nos. 62a to 62vv) piled up against the west wall of the Antechamber.December 1922, Tutankhamun’s Tomb | View of the northern wall of the Antechamber showing the sentinel statues (Carter nos. 22 & 29) guarding the sealed doorway leading to the King’s Burial Chamber.December 1922, Tutankhamun’s Tomb | Objects stacked under the lion couch (Carter no. 35) against the west wall of the Antechamber included an ivory and ebony chest (Carter no. 32), black ‘shrine-shaped boxes’ (Carter nos. 37 and 38) and a child’s chair made of ebony (Carter no. 39).December 1922, Tutankhamun’s Tomb | The rectangular white box (Carter no. 50), in front of the lion couch (Carter no. 35) in the Antechamber, contained, amongst other items, linen garments (shirts, shawls and loin cloths), 18 sticks, 69 arrows and a trumpet.29th November 1923, Tutankhamun’s Tomb | Howard Carter (on the left) working with his friend and colleague Arthur Callender on wrapping one of two sentinel statues of Tutankhamun (Carter no. 22) found in the Antechamber, before their removal to the ‘laboratory’ set up in the tomb of Sethos II (KV 15). These statues had been placed either side of the sealed entrance to the Burial Chamber.December 1923, Tutankhamun’s Tomb | The linen pall, decorated with bronze ‘rosettes’ (Carter no. 209) inside the walls of the first (outermost) golden shrine (Carter no. 207) in the north west corner of the Burial Chamber.October 1926, Tutankhamun’s Tomb | A line of chests down the centre of the Treasury, ending with the canopic chest (Carter no. 266) which housed the king’s linen-wrapped stomach, intestines, liver and lungs in miniature gold coffins, inside an alabaster canopic box.October 1926, Tutankhamun’s Tomb | Three wooden chests (the middle one in the shape of a cartouche) on the floor of the Treasury (Carter nos. 267, 269 and 270). Amongst other items these contained earrings, sandals and a wax model of a heron.October 1925, Tutankhamun’s Tomb | Howard Carter working on the lid of the second (middle) coffin, still nestled within the case of the first (outermost) coffin in the Burial Chamber.November/December 1923, Sethos II’s Tomb (‘laboratory’) | Arthur Mace (left) and Alfred Lucas working outside the ‘laboratory’ set up in the tomb of Sethos II (KV 15), stabilizing the surface of one of the state chariots (Carter no. 120) found in the Antechamber.30th December 1923, Tutankhamun’s Tomb | Howard Carter (left), Arthur Mace and an Egyptian workman standing on scaffolding, roll back the linen pall (Carter no. 209) which lay over a gilded, wooden frame (Carter no. 208) between the first (outermost) and second shrines.November 1926, Tutankhamun’s Tomb | Objects, including numerous model boats (Carter nos. 284 to 287), stacked against the southern wall of the Treasury.December 1922, Tutankhamun’s Tomb | Sealed alabaster ‘unguent’ vases (Carter nos. 57, 58, 60 and 61) between the cow-headed (Carter no. 73) and lion (Carter no. 35) couches against the west wall of the Antechamber.October 1926, Tutankhamun’s Tomb | The Anubis shrine (Carter no. 261) on the threshold of the Treasury viewed from the Burial Chamber. The figure of Anubis was covered with a linen shirt inscribed with the cartouche of Akhenaten.4th January 1923, Tutankhamun’s Tomb | Howard Carter (kneeling), Arthur Callender and an Egyptian workman in the Burial Chamber, looking through the open doors of the four gilded shrines towards the quartzite sarcophagus.January 1924, Sethos II’s Tomb (‘laboratory’) | Arthur Mace (standing) and Alfred Lucas (sitting) working inside the makeshift ‘laboratory’ (set up in KV 15, the tomb of Sethos II) on the conservation of one of the two sentinel statues from the Antechamber (Carter no. 22). The statue shows the King wearing the nemes headdress, kilt and sandals, and carrying a mace and a staff.29th/30th October 1925, Tutankhamun’s Tomb | The gold mask (Carter no. 256a) in situ on the mummy of the King, still inside the third (innermost) solid gold coffin (Carter no. 255).December 1923, Tutankhamun’s Tomb | Howard Carter (centre), Arthur Callender and two Egyptian workmen lifting one roof section from the first, outermost shrine (Carter no. 207). With its double sloping roof, the shape of this shrine resembles that of a ‘sed festival pavilion’; it was made of from twenty separate oak sections, held together by a variety of different joints.2nd December 1923, Tutankhamun’s Tomb | Howard Carter (at the top of the stairs), Arthur Callender and Egyptian workmen removing the wall between the Antechamber and the Burial Chamber to enable the dismantling of the four golden shrines enclosing the sarcophagus.Herbert George Edward Stanhope Molyneux, 5th Earl of Carnarvon, reading on the verandah of ‘Castle Carter’, Carter’s house at Elwat el-Dibbân on the Theban West Bank.
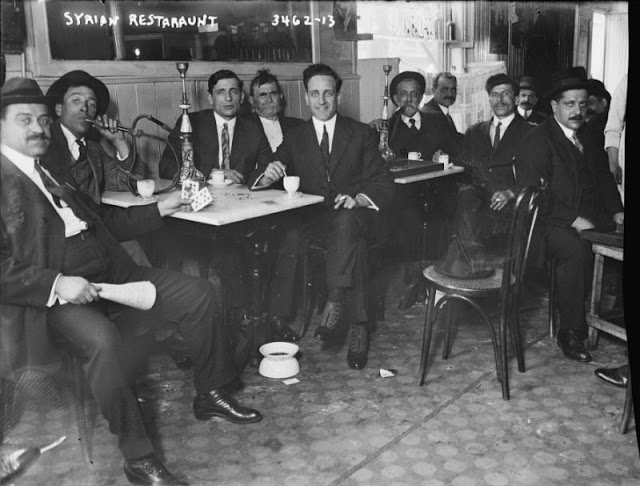
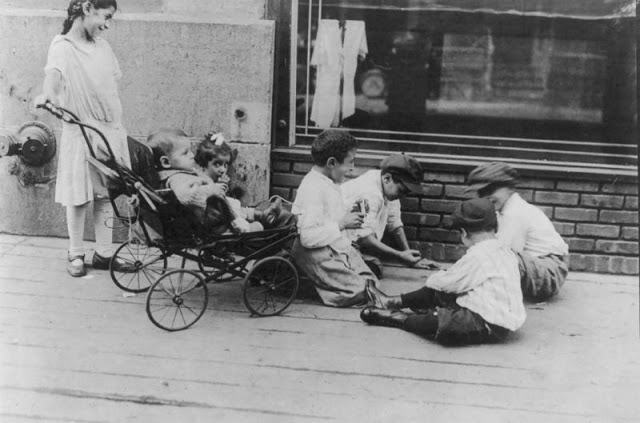
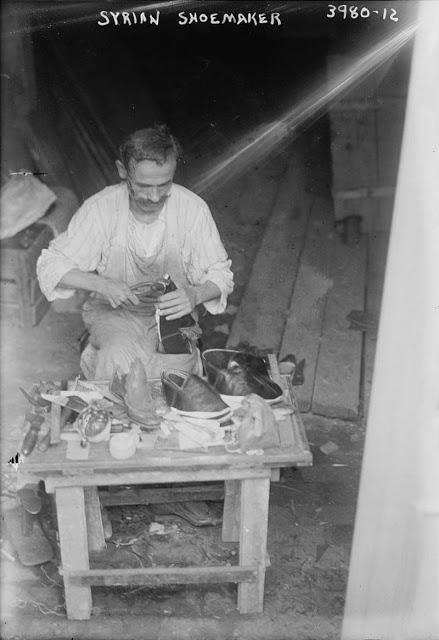
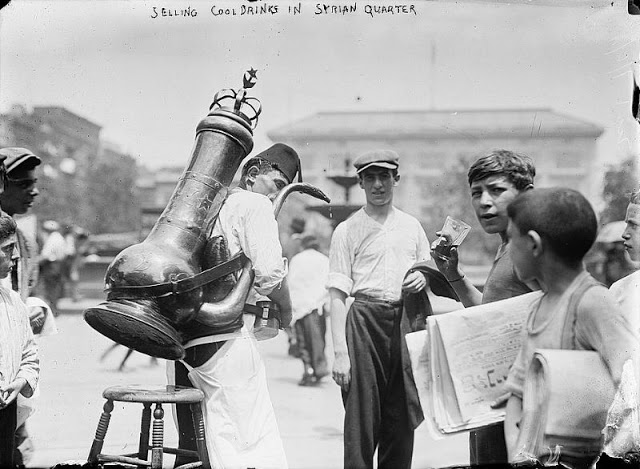
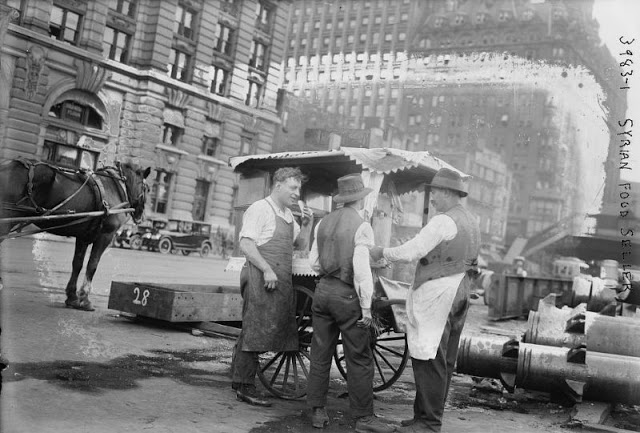
The Chinese have Chinatown. The Italians have Little Italy. And before the Brooklyn-Battery Tunnel pummeled its way into Manhattan, people from the Middle East also shared a slice of the city’s history. Little Syria, as it was known, was the cultural hub of America’s first middle eastern immigrant community and it was located just south of where the current World Trade Center stands today.
For 60 years between 1880 until the 1940s, Arab-Americans poured into New York City from Greater Syria made up of present-day countries including Lebanon, Syria, Jordan and Israel to escape religious persecution and poverty. They found homes in crowded tenements on a six block stretch of Washington Street from Liberty Street to Battery Park, alongside Armenians, Greeks, and other communities from the Middle East and the Mediterranean.
According to an 1899 article from the New York Times about the Syrian Quarter and its 3,000 residents, the newly arrived immigrants made a home for themselves in this “tousled unwashed section of New York”.
“Turks, Armenians, Syrians, when they ship for America, do not leave all their quaint customs, garments, ways of thinking at home. Nor do they become ordinary American citizens directly after landing. Just enough of their traits, dress, ideas remain, no matter how long they have been here, to give the colonies they form spice and a touch of novelty.”
Many of the early Syrian-Americans began their new lives as street vendors before saving up to establish their own businesses. According to the New York Public Library, over 300 Syrian businesses were listed in the 1908 Syrian Business Directory of New York.
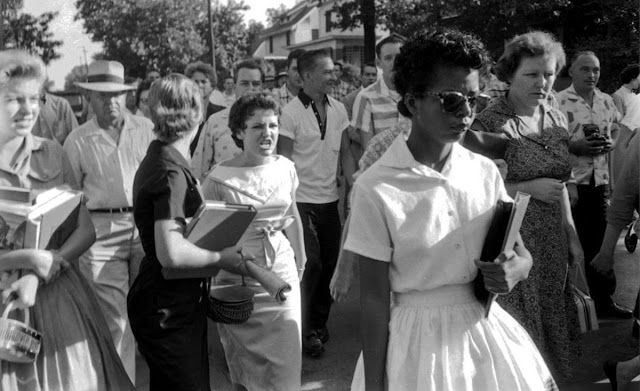
You’ve probably seen the photo: a young African-American girl walks to school, her eyes shielded by sunglasses. She is surrounded by a hateful crowd of angry white people, including a girl caught mid-jeer, her teeth bared and her face hardened with anger. It’s one of the most famous images of the civil rights era, but it turns out that the story of the young women in the photo is even more complicated than the racial drama their faces portray.
Elizabeth Eckford (right) attempts to enter Little Rock High School on Sept. 4, 1957, while Hazel Bryan (left) and other segregationists protest.
On September 4th, 1957, nine African-American students entered Little Rock Central High School as the school’s first black students, including Elizabeth Eckford. On her way to the school, a group of white teenage girls followed Eckford, chanting “Two, four, six, eight! We don’t want to integrate!” One of these girls was Hazel Bryan. Benjamin Fine of The New York Times later described her as “screaming, just hysterical, just like one of these Elvis Presley hysterical deals, where these kids are fainting with hysteria.” Bryan is also credited as shouting, “Go home, nigger! Go back to Africa!”
After the photo became public, Hazel started to receive “critical” mail, all from the north. Author David Margolick wrote that while Hazel only found the criticism “surprising”, “Hazel’s parents, though, found her sudden notoriety sufficiently alarming to pull her out of the school.”
Bryan left her new school when she was 17, got married to Antoine Massery and began a family. After that, her attitude toward Martin Luther King and the concept of desegregation changed. “Hazel Bryan Massery was curious, and reflective… One day, she realized, her children would learn that the snarling girl in their history books was their mother. She realized she had an account to settle.”
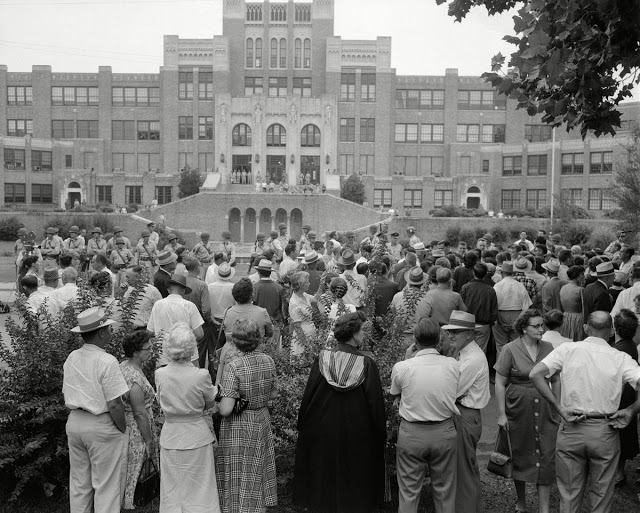
The crowd gathered outside Little Rock Central High School. The military men were ordered by Governor Orval Faubus to surround the school and prevent Black students from entering the grounds.
In 1963, having changed her mind on integration and feeling guilt for her treatment of Eckford, Bryan contacted Eckford to apologize. They went their separate ways after this first meeting, and Eckford did not name the girl in the picture when asked about it by reporters.
During the time after Little Rock, Hazel had become increasingly political, branching out into peace activism and social work. David Margolick discovered, “She taught mothering skills to unmarried black women, and took underprivileged black teenagers on field trips. She frequented the black history section at the local Barnes & Noble, buying books by Cornel West and Shelby Steele and the companion volume to Eyes on the Prize.”
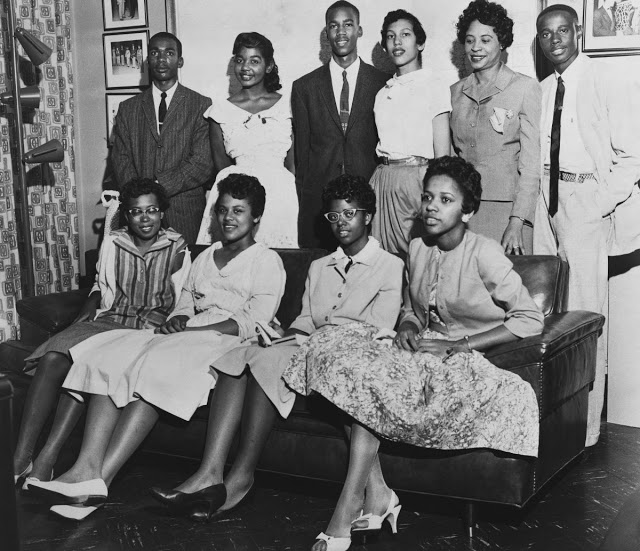
These nine teenagers integrated the white high school in Little Rock, Arkansas. They were kicked, ridiculed, threatened, called every name, spat on, ignored, and had acid thrown in their faces. Bottom row (L-R): Thelma Mothershed, Minnijean Brown, Elizabeth Eckford, Gloria Ray; Top row (L-R): Jefferson Thomas, Melba Pattillo, Terrence Roberts, Carlotta Walls, Daisy Bates (NAACP President), Ernest Green, 1957.
Bryan hoped her reputation could be gained back, but this did not happen until the 40th anniversary of Central’s desegregation in 1997. Will Counts, the journalist who took the famous picture, arranged for Elizabeth and Hazel to meet again. The reunion provided an opportunity for acts of reconciliation, as noted in this editorial from the Arkansas Democrat-Gazette on the first day of 1998:
One of the fascinating stories to come out of the reunion was the apology that Hazel Bryan Massery made to Elizabeth Eckford for a terrible moment caught forever by the camera. That 40-year-old picture of hate assailing grace — which had gnawed at Ms. Massery for decades — can now be wiped clean, and replaced by a snapshot of two friends. The apology came from the real Hazel Bryan Massery, the decent woman who had been hidden all those years by a fleeting image. And the graceful acceptance of that apology was but another act of dignity in the life of Elizabeth Eckford.
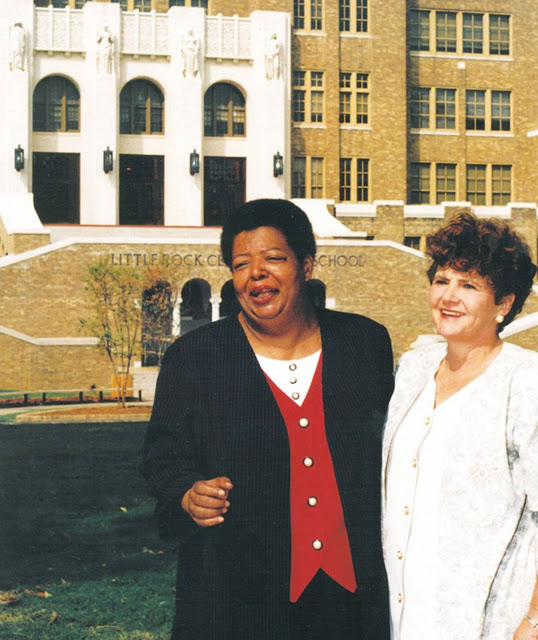
Elizabeth Eckford and Hazel Bryan Massery at Little Rock Central High School in 1997.
Feeling awkward when they first met, Eckford and Bryan surprisingly became friends afterwards:
They went to flower shows together, bought fabrics together, took mineral baths and massages together, appeared in documentaries and before school groups together. Since Elizabeth had never learned to drive, Hazel joked that she had become Elizabeth’s chauffeur. Whenever something cost money, Hazel treated; it was awkward for Elizabeth, who had a hard time explaining to people just how poor she was.
Soon after, the friendship began to fray. In 1999, David Margolick travelled to Little Rock and arranged to meet Elizabeth and Hazel. According to Hazel Bryan, she said, “I think she still… at times we have a little… well, the honeymoon is over and now we’re getting to take out the garbage.” As Eckford began to believe Bryan “wanted me to be cured and be over it and for this not to go on… She wanted me to be less uncomfortable so that she wouldn’t feel responsible anymore.” The other eight of the Little Rock Nine didn’t want this friendship to last any longer. The friendship quietly dissolved in 1999, when Elizabeth Eckford wrote “True reconciliation can occur only when we honestly acknowledge our painful, but shared, past” on the brick of Central High. This message affected their friendship.
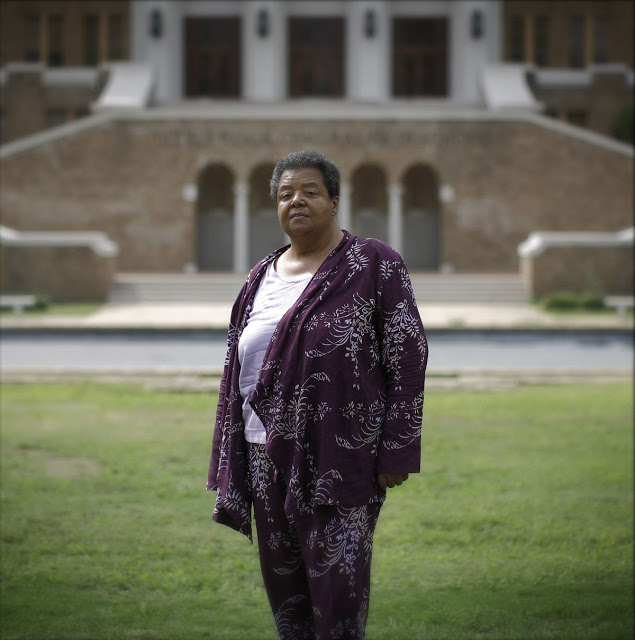
Elizabeth Eckford in front of the main entrance of Central High School in Little Rock, Arkansas, 2007. Eckford was the first of nine black schoolchildren to make history on September 4th, 1957 when she arrived, alone, for the first day of classes at the all-white high school.
The principal of Central High School stated “I just had hoped that I could show this picture and say, ‘This happened, and that happened, and now…’ and there is no ‘now’.” She added, “And that makes me sad. It makes me sad for them, it makes me sad for the future students at our school, and for the history books, because I’d like a happy ending. And we don’t have that.”
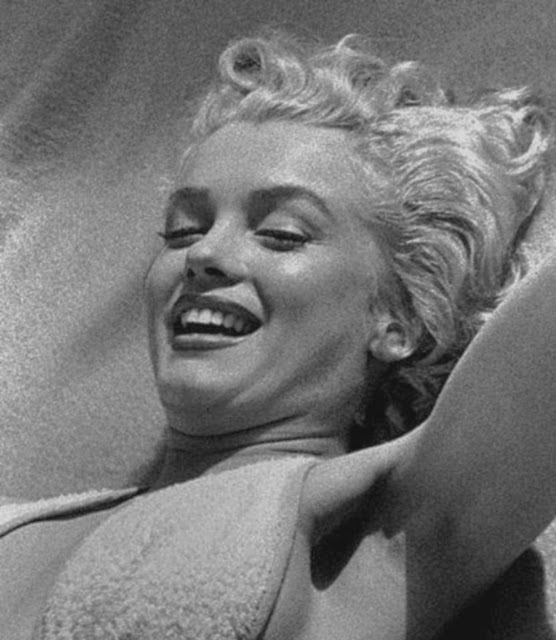
In 1945 Hungarian-Romanian photographer Andre de Dienes met the nineteen-year-old Marilyn Monroe, then called Norma Jeane Baker, who was a model on the books of Emmeline Snively’s Blue Book Model Agency
Norma Jeane had recently separated from her husband, James Dougherty, and told Dienes of her wish to become an actress. Dienes suggested that they go on a road trip to photograph her in the natural landscapes, for which Dienes paid her a flat fee of $200.
Dienes next met her on Labor Day in 1946, with her new name of Marilyn Monroe, they next worked together in 1952, where he shot her at the Bel Air Hotel and 1953, where she telephoned him at 2am, and took him to a darkened street where he used his car headlights to illuminate her, taking pictures her wide-eyed and unmade up. Dienes last saw her alive in June 1961.
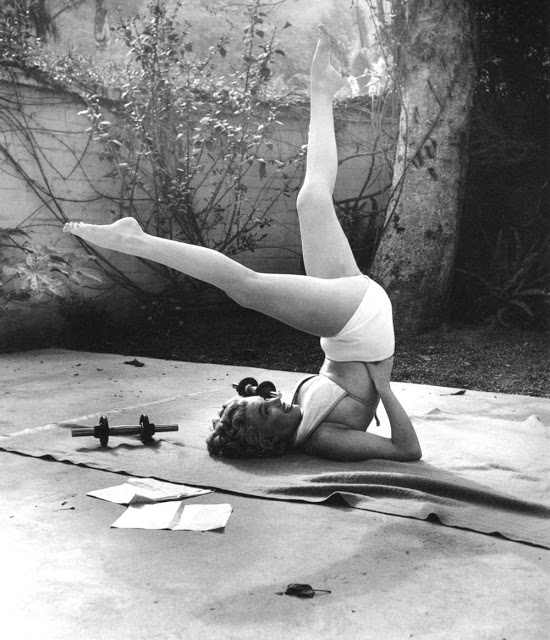
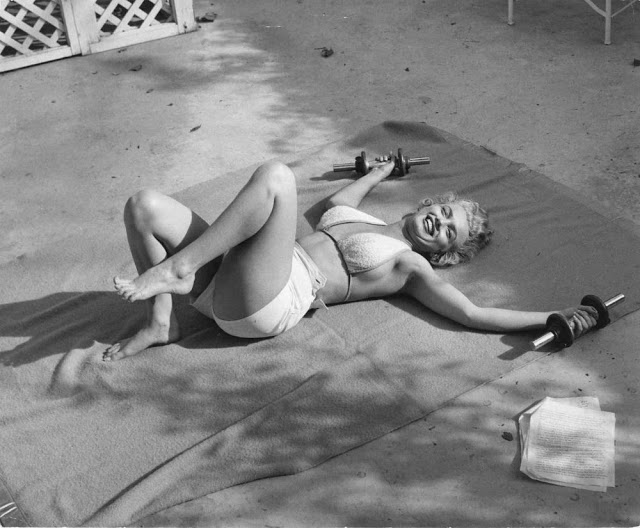
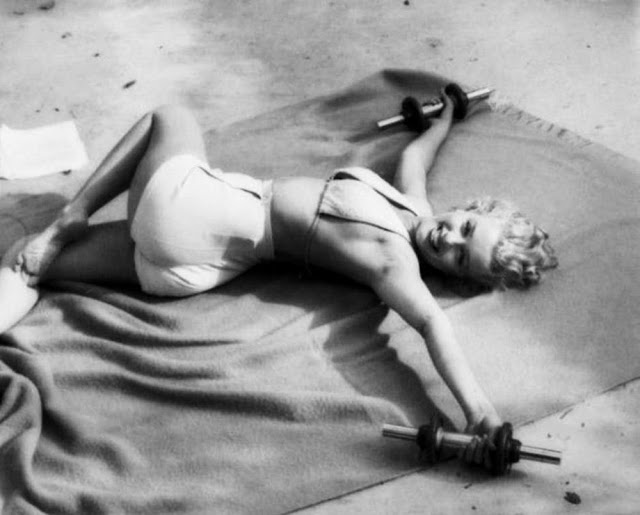
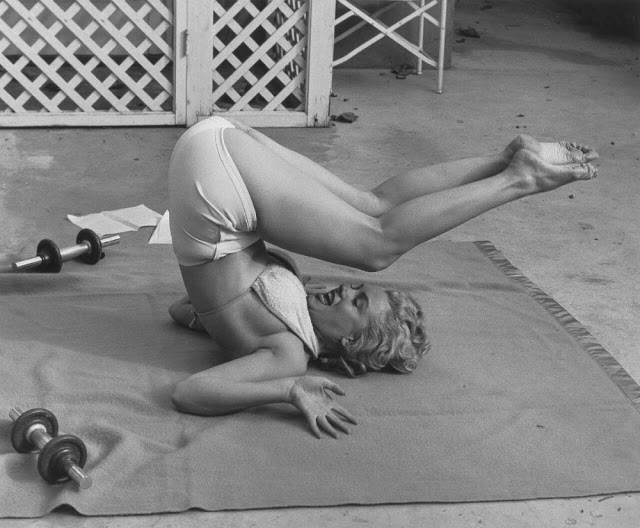
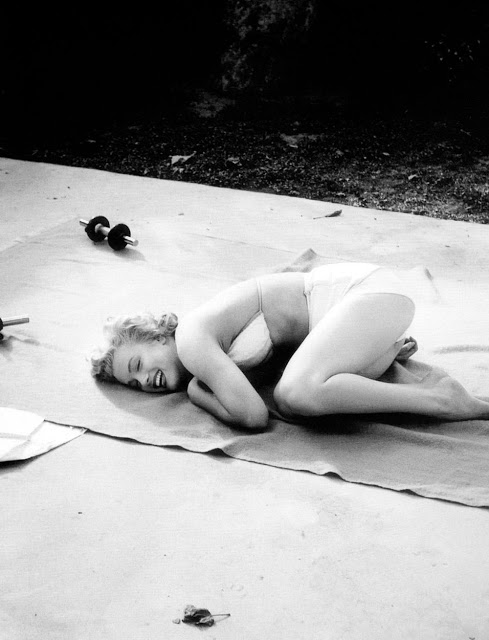
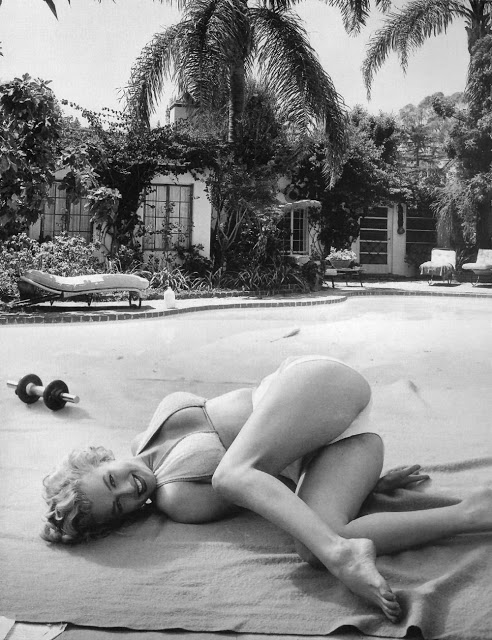
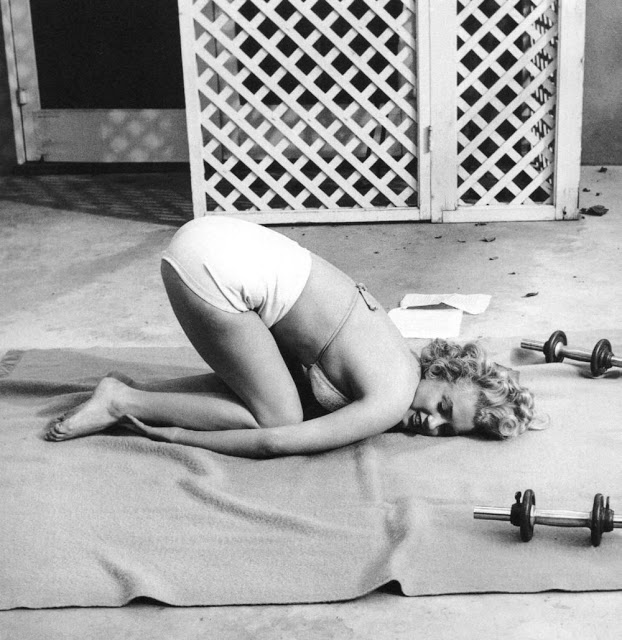
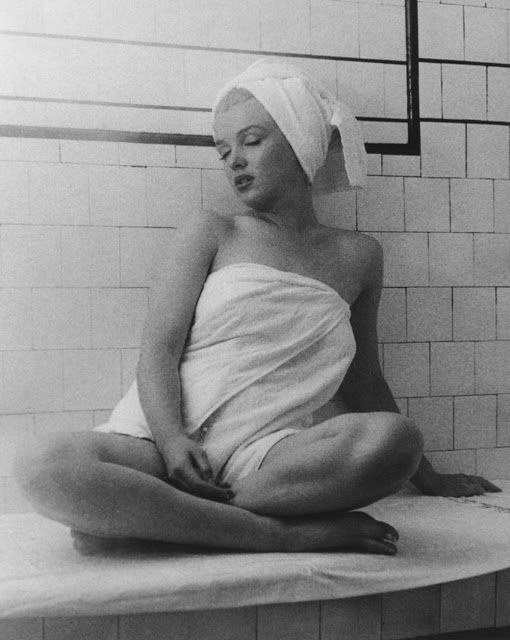
These photos were taken by Hungarian-Romanian photographer Andre de Dienes at Bel Air Hotel in 1953, showing the beautiful Marilyn Monroe working out — or not really — and keeping herself in tip-top shape. De Dienes was also among the first photographers who photographed Marilyn during her early modeling days, notably the 1949 pin-up series taken at Long Island’s Tobay Beach in New York.
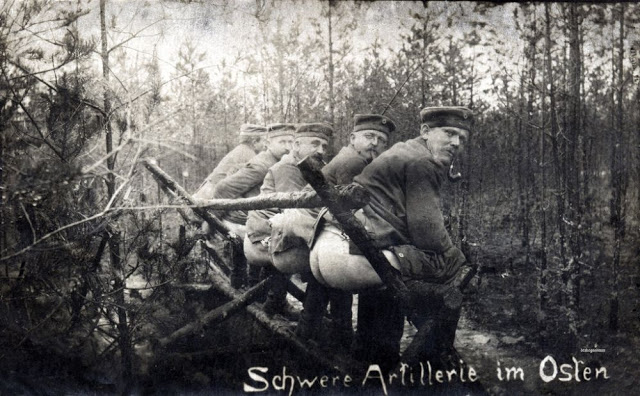
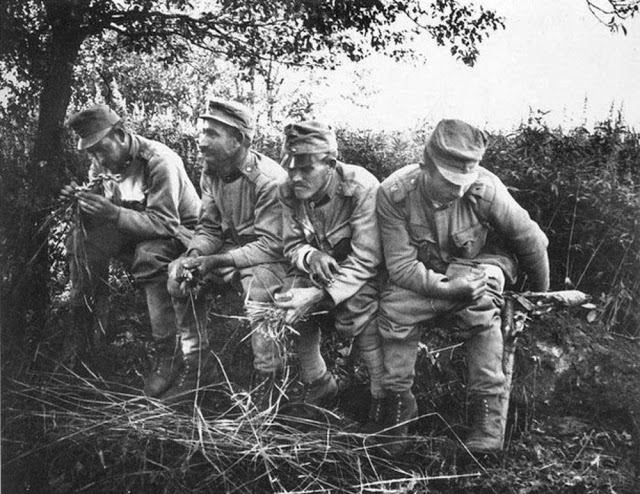
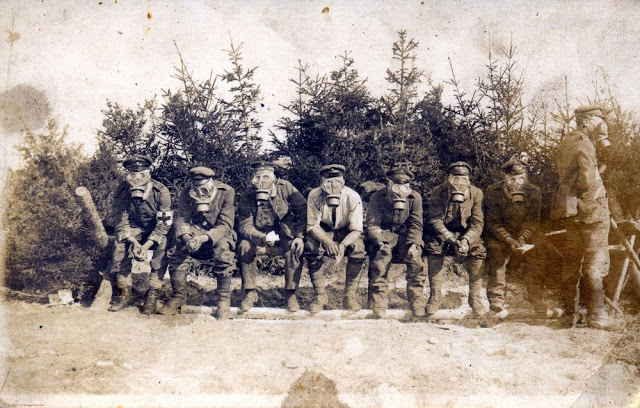
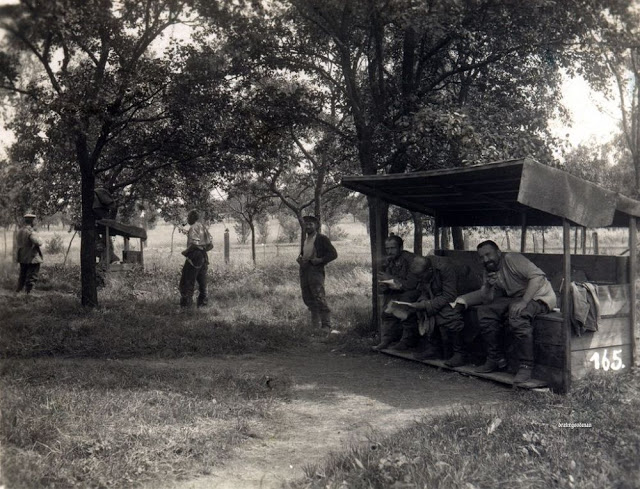
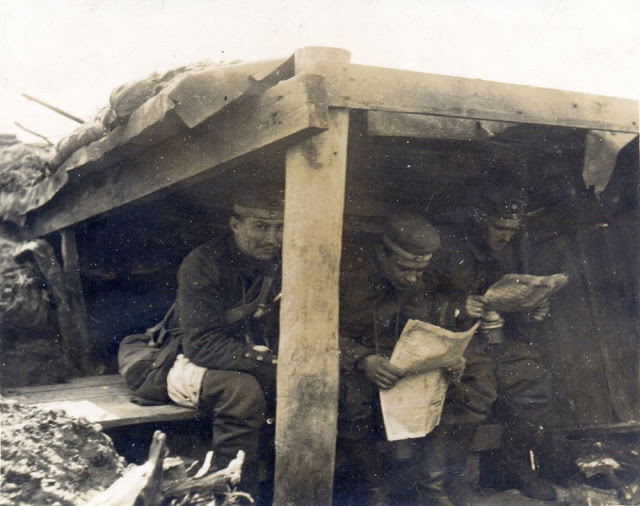
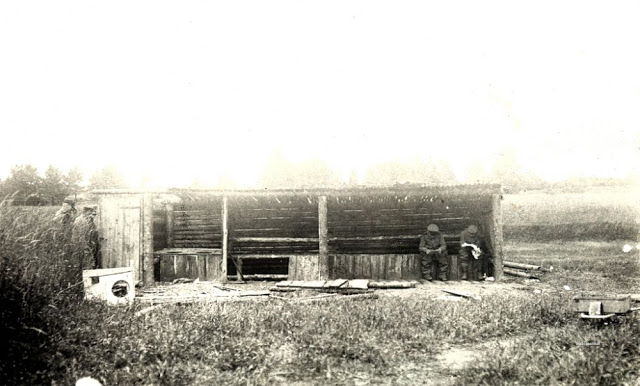
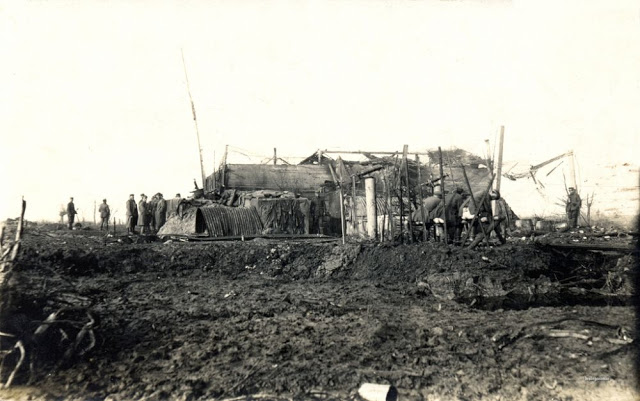
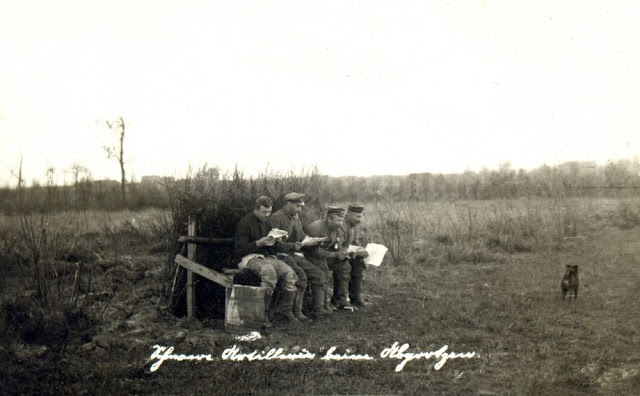
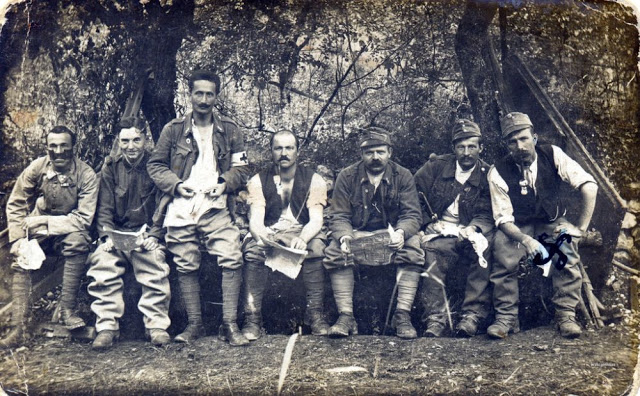
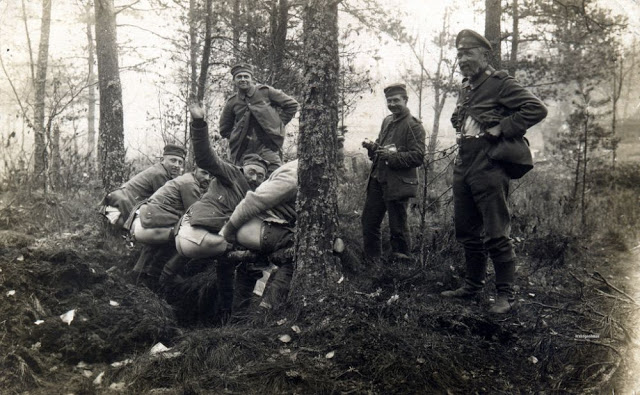
Soldiers lived in the trenches when fighting during World War I, it was muddy, noisy and pretty basic. They didn’t have toilets so it was probably a bit stinky too.
The latrines was the name given to trench toilets. They were usually pits, 4 ft. to 5 ft. deep, dug at the end of a short sap. Each company had two sanitary personnel whose job it was to keep the latrines in good condition. In many units, officers gave out sanitary duty as a punishment for breaking army regulations. Before a change-over in the trenches, the out-going unit was supposed to fill in its latrines and dig a new one for the new arrivals.
The best latrines came in the form of buckets which were emptied and disinfected regularly by designated orderlies. Some latrines were very basic pit or ‘cut and cover’ systems. There were strict rules prohibiting ‘indiscriminate urinating’, but at times soldiers did resort to urinating in a tin and throwing it out of the trench.
Flying across the Atlantic on the airship Hindenburg was the fastest and most luxurious way to travel between Europe and America in the 1930s.
The interior furnishings of the Hindenburg were designed by Fritz August Breuhaus, whose design experience included Pullman coaches, ocean liners, and warships of the German Navy.
The reform ideas as to art and society of radical modernism, as “Bauhaus” for example represented them, were as far away from Breuhaus as they were far away from his wealthy clients.
The furnishing of the “world’s first flying hotel”, the Zeppelin airship LZ 129 – better known as the “Hindenburg” – which had been in complete accordance with Breuhaus’ overall plans, was regarded as a spectacular thing. Nevertheless, its realization took place as late as the middle of the 1930s.
The Hindenburg’s Interior: Passenger Decks
The passenger accommodation aboard Hindenburg was contained within the hull of the airship (unlike Graf Zeppelin, whose passenger space was located in the ship’s gondola). The passenger space was spread over two decks, known as “A Deck” and “B Deck.”
“A” Deck on Hindenburg
Hindenburg’s “A Deck” contained the ship’s Dining Room, Lounge, Writing Room, Port and Starboard Promenades, and 25 double-berth inside cabins.
The passenger accommodations were decorated in the clean, modern design of principal architect Professor Fritz August Breuhaus, and in a major improvement over the unheated Graf Zeppelin, passenger areas on Hindenburg were heated, using forced-air warmed by water from the cooling systems of the forward engines.
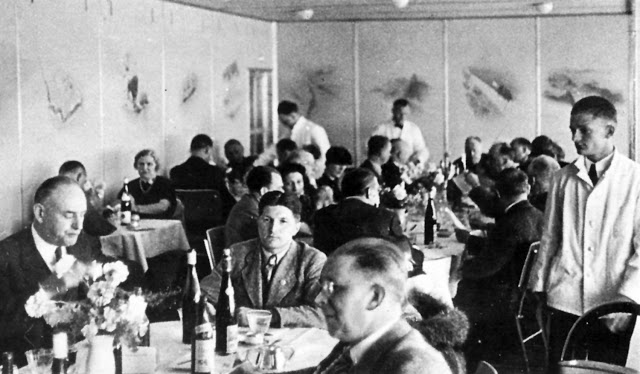
Dining Room
Hindenburg’s Dining Room occupied the entire length of the port side of A Deck. It measured approximately 47 feet in length by 13 feet in width, and was decorated with paintings on silk wallpaper by Professor Otto Arpke, depicting scenes from Graf Zeppelin’s flights to South America.
The tables and chairs were designed by Professor Fritz August Breuhaus using lightweight tubular aluminum, with the chairs upholstered in red.
Dining Room of Airship HindenburgDining Room of Airship HindenburgDining Room of Airship HindenburgDining Room of Hindenburg, with Port Promenade
Lounge
On the starboard side of A Deck were the Passenger Lounge and Writing Room.
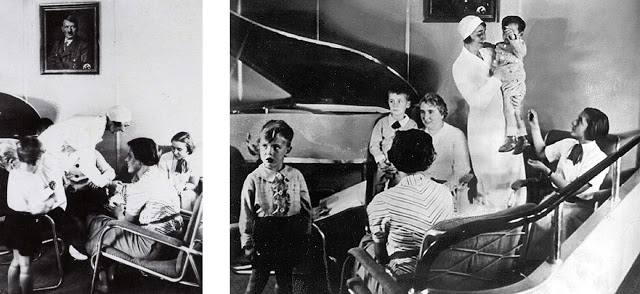
The Lounge was approximately 34 feet in length, and was decorated with a mural by Professor Arpke depicting the routes and ships of the explorers Ferdinand Magellan, Captain Cook, Vasco de Gama, and Christopher Columbus, the transatlantic crossing of LZ-126 (USS Los Angeles), the Round-the-World flight and South American crossings of LZ-127 Graf Zeppelin, and the North Atlantic tracks of the great German ocean liners Bremen and Europa. The furniture, like that in the dining room, was designed in lightweight aluminum by Professor Breuhaus, but the chairs were upholstered in brown. During the 1936 season the Lounge contained a 356-pound Bluthner baby grand piano, made of Duralumin and covered with yellow pigskin.
Passenger LoungeTwo views of the Lounge, showing portrait of Hitler and the ship’s duralumin piano. (The stewardess is Emilie Imhoff, who was killed at Lakehurst in 1937.)
The piano was removed before the 1937 season and was not aboard Hindenburg during it’s last flight.
Passenger LoungePassenger LoungePassenger Lounge on the Airship Hindenburg, showing promenade windows.
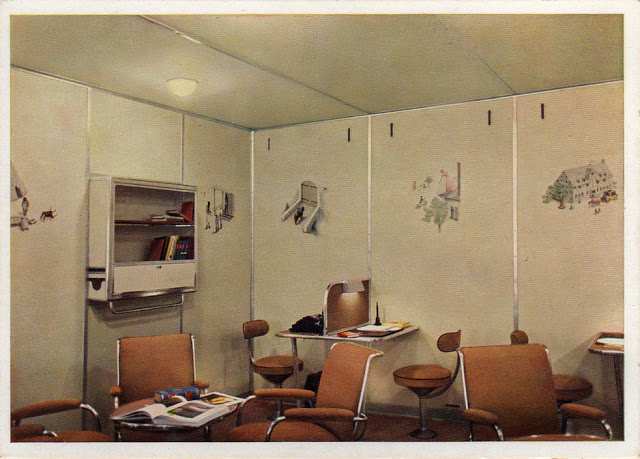
Writing Room
Next to the lounge was a small Writing Room.
Writing Room
The walls of the Writing Room were decorated with paintings by Otto Arpke depicting scenes from around the world:
Some of the Otto Arpke paintings aboard Hindenburg
Passenger Cabins on Hindenburg
Hindenburg was originally built with 25 double-berthed cabins at the center of A Deck, accommodating 50 passengers. After the ship’s inaugural 1936 season, 9 more cabins were added to B Deck, accommodating an additional 20 passengers. The A Deck cabins were small, but were comparable to railroad sleeper compartments of the day. The cabins measured approximately 78? x 66?, and the walls and doors were made of a thin layer of lightweight foam covered by fabric. Cabins were decorated in one of three color schemes — either light blue, grey, or beige — and each A Deck cabin had one lower berth which was fixed in place, and one upper berth which could be folded against the wall during the day.
Passenger Cabin aboard Hindenburg
Each cabin had call buttons to summon a steward or stewardess, a small fold-down desk, a wash basin made of lightweight white plastic with taps for hot and cold running water, and a small closet covered with a curtain in which a limited number of suits or dresses could be hung; other clothes had to be kept in their suitcases, which could be stowed under the lower berth. None of the cabins had toilet facilities; male and female toilets were available on B Deck below, as was a single shower, which provided a weak stream of water “more like that from a seltzer bottle” than a shower, according to Charles Rosendahl. Because the A Deck cabins were located in the center of the ship they had no windows, which was a feature missed by passengers who had traveled on Graf Zeppelin and had enjoyed the view of the passing scenery from their berths.
Passenger Cabin aboard Hindenburg
Promenades On either side of A Deck were promenades, featuring seating areas and large windows which could be opened in flight.
Starboard Promenade aboard LZ-129 Hindenburg, next to the Lounge.
“B” Deck on Hindenburg
B Deck on Hindenburg, located directly below A Deck, contained the ship’s kitchen, passenger toilet and shower facilities, the crew and officers’ mess, and a cabin occupied by Chief Steward Heinrich Kubis (containing a door to the keel corridor, which was the only connection between passenger and crew spaces).
During the winter of 1936-1937, while the ship was laid up in Frankfurt, additional passenger cabins were also added in Bay 11, just aft of ring 173. The new cabins had windows offering an outside view, and were slightly larger than the cabins on A Deck. The additional weight of these new cabins was made possible by the unexpected (and unwelcome) need to operate the ship with hydrogen, which has greater lifting power than the helium for which Hindenburg had been designed.
The Smoking Room
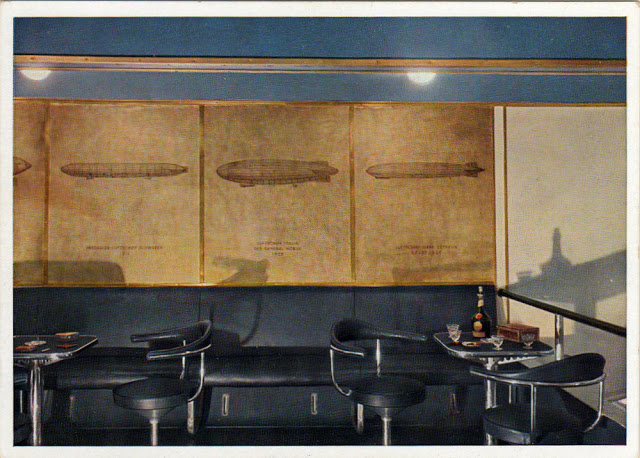
Perhaps most surprising, aboard a hydrogen airship, there was also a smoking room on the Hindenburg. The smoking room was kept at higher than ambient pressure, so that no leaking hydrogen could enter the room, and the smoking room and its associated bar were separated from the rest of the ship by a double-door airlock. One electric lighter was provided, as no open flames were allowed aboard the ship. The smoking room was painted blue, with dark blue-grey leather furniture, and the walls were decorated with yellow pigskin and illustrations by Otto Arpke depicting the history of lighter-than-air flight from the Montgolfiers’s balloon to the Graf Zeppelin. Along one side of the room was a railing above sealed windows, through which passengers could look down on the ocean or landscape passing below.
The smoking room was perhaps the most popular public room on the ship, which is not surprising in an era in which so many people smoked.
Pressurized Smoking Room aboard LZ-129 Hindenburg, showing door to the bar, with the air lock doors beyond.
The Bar
The Hindenburg’s bar was a small ante-room between the smoking room and the air-lock door leading to the corridor on B-Deck. This is where Hindenburg bartender Max Schulze served up LZ-129 Frosted Cocktails (gin and orange juice) and Maybach 12 cocktails (recipe lost to history), but more importantly, it is where Schulze monitored the air-lock to ensure that no-one left the smoking room with burning cigarattes, cigars, or pipes. Schulze had been a steward and bartender aboard the ocean liners of the Hamburg-Amerika Line and was well liked by Hindenburg passengers, even if he was surprisingly unfamiliar with basic American cocktails such as the Manhattan. The bar and smoking room were also the scene of a raucous party on the Hindenburg’s maiden voyage to America, where passenger Pauline Charteris improvised a kirschwasser cocktail after the ship ran out of gin for martinis.
Hindenburg BarCocktails aboard the Hindenburg
Control Car, Flight Instruments, and Flight Controls
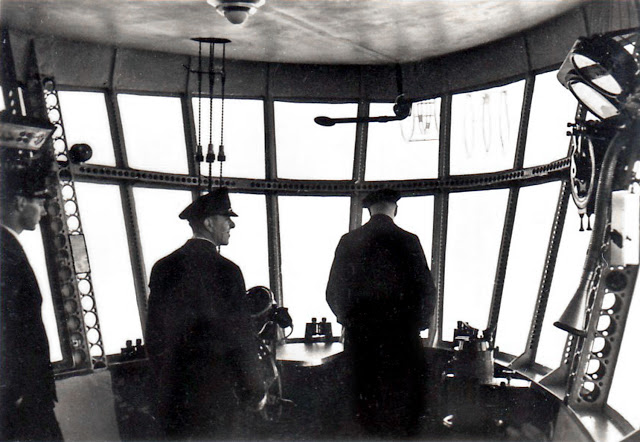
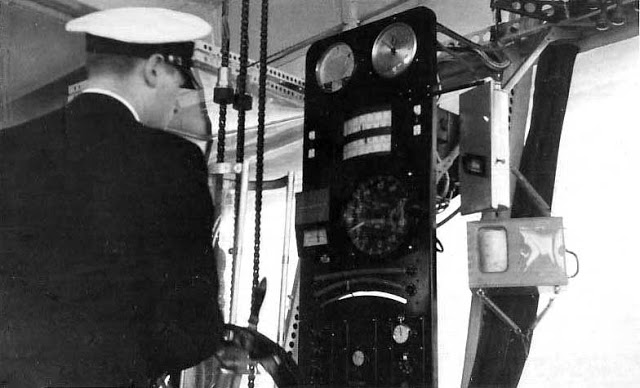
An overview of the Hindenburg’s flight instruments and flight controls.
Hindenburg Control Room (Ludwig Felber at helm, possibly Knut Eckener to his right). At far left is ballast board, then rudder station with gyro compass repeater, to right of tall figure is the eyepiece of a drift measuring telesope, and to the right is the engine telegraph, axial corridor speaking tube, altimeter, and engine instruments; to the far right is a variometer.HindenburgElevator Wheel, Elevator Panel, and Ballast BoardHindenburg’s Elevator PanelHindenburg’s Navigation RoomErnst Lehmann with Navigation RadiosHindenburg main telephone station
Crew Areas and Keel
Other than the control car, the crew and work areas aboard Hindenburg were primarily located along the keel, including officer and crew sleeping quarters, the radio room, post office, electrical room, work rooms, and rope handling areas for the mooring lines.
Fuel, fresh water, and ballast tanks were also located along the keel, as were cargo storage areas. The keel also offered access to the engine cars, and the auxiliary control and docking station in the tail, and ladders at Rings 62, 123.5, and 188 offered access to the axial catwalk at the center of the ship. A section of B Deck included Hindenburg’s kitchen and separate mess areas for the officers and crew.
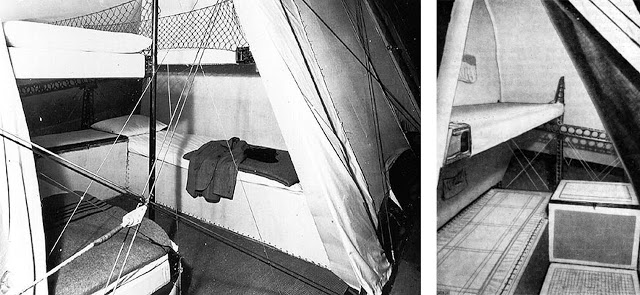
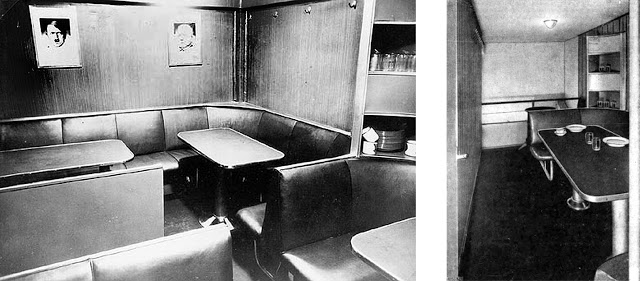
Hindenburg Radio RoomHindenburg Electrical RoomHindenburg crew bunks, along the keelCargo storage along Hindenburg’s keelHindenburg galley on B DeckHindenburg galley on B DeckB Deck: Crew mess, with photographs of Hitler and Hindenburg (left); Officers mess (right)